
dtech
New member
The way I ended up going about this is somewhat backwards, but when I posted the fist "day in the shop" I had no idea there would be more. I received several requests for more info, so here we go:
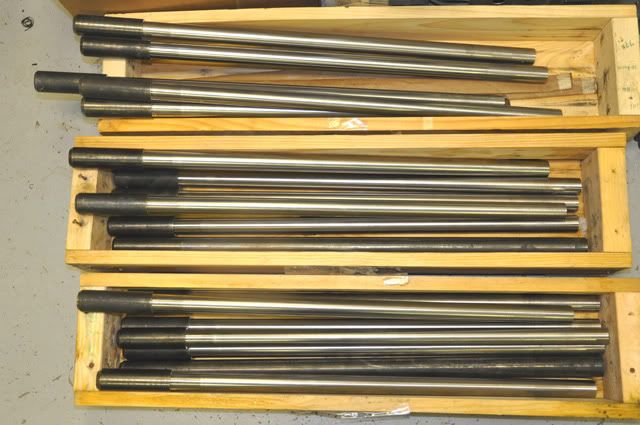
This is how the barrels come into my shop from Shilen. I may get 2 or three barrels in at a time, or may get 30 or 40, it all depends on their production schedule.
Now from one of the earlier posts, you may remember a huge batch of barrels that got chambered and were ready to profile. Some of those barrels got threaded, headspaced, profiled fluted and shipped. Even though there are still unfinished barrels from that batch, this batch of blanks that I received contains blanks that I have been out of. What I do then is sort through the order and put the ones I don't need into stock, and start to prepare the needed blanks for a chambering batch.
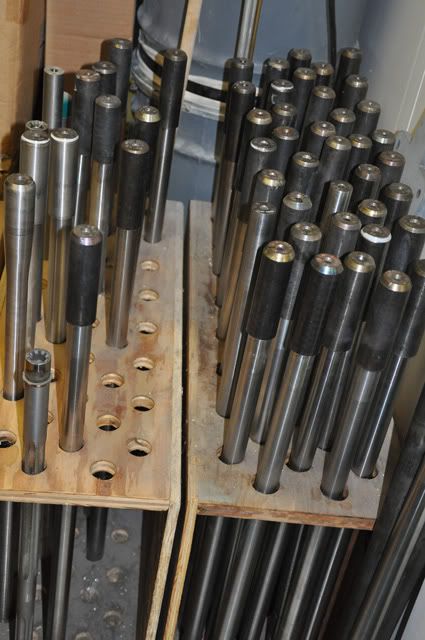
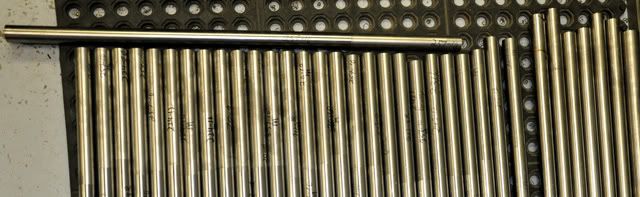
I just store my excess barrel inventory in racks like this. Recently, most of my barrels are in production, and that's why there are gaps in my storage rack.
Once I have all of the blanks gathered up that I am going to be working with, I label the barrels with permanent marker with my internal part numbers. The barrel-blanks come stamped from Shilen with twist-rate, caliber and grade, but that end of the barrel gets removed in my preparation for chambering.
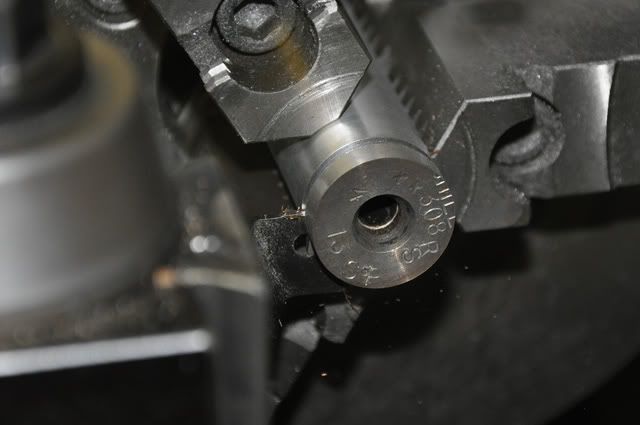
The first thing that gets done to the blank is the excess material on the chamber end gets removed.
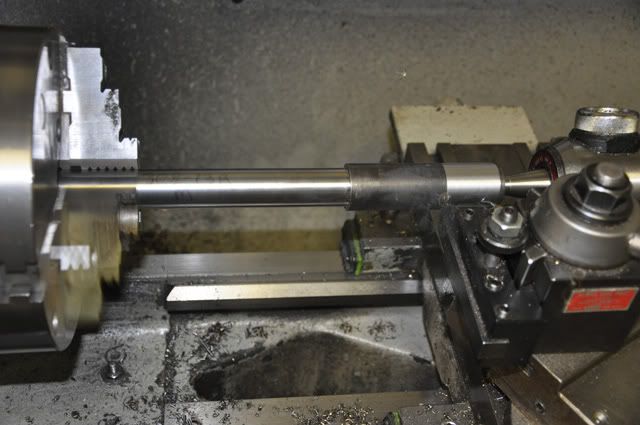
Once that material is removed, a precision, concentric cut is made for the first 8 to 10 inches over the chamber end of the barrel.
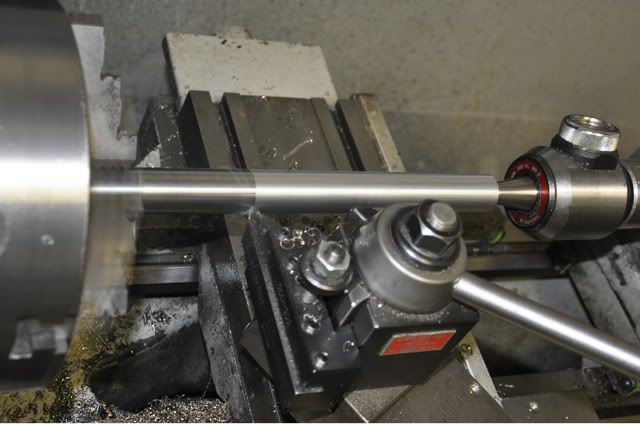
After that, the end of the barrel is parted-off, and a cutter is used to make a smooth, square face on the chamber end of the blank.
The blank is then turned end-for-end in the lathe and a chamfer is cut into the muzzle end of the barrel. This chamfer will later be used to couple my high-pressure flush system to the barrel while chambering.

After those steps, the new blanks are now ready for the next chambering batch, and the whole cycle starts over again!
In all honesty, what I have posted is not 100% accurate as to the procedures I go through to prepare the blanks. I have left out a few minor details and twists just in attempt not to show certain tooling or procedures. If some of you real gun-nuts or metal-heads see some anomalies in this post, that is why.
This is how the barrels come into my shop from Shilen. I may get 2 or three barrels in at a time, or may get 30 or 40, it all depends on their production schedule.
Now from one of the earlier posts, you may remember a huge batch of barrels that got chambered and were ready to profile. Some of those barrels got threaded, headspaced, profiled fluted and shipped. Even though there are still unfinished barrels from that batch, this batch of blanks that I received contains blanks that I have been out of. What I do then is sort through the order and put the ones I don't need into stock, and start to prepare the needed blanks for a chambering batch.
I just store my excess barrel inventory in racks like this. Recently, most of my barrels are in production, and that's why there are gaps in my storage rack.
Once I have all of the blanks gathered up that I am going to be working with, I label the barrels with permanent marker with my internal part numbers. The barrel-blanks come stamped from Shilen with twist-rate, caliber and grade, but that end of the barrel gets removed in my preparation for chambering.
The first thing that gets done to the blank is the excess material on the chamber end gets removed.
Once that material is removed, a precision, concentric cut is made for the first 8 to 10 inches over the chamber end of the barrel.
After that, the end of the barrel is parted-off, and a cutter is used to make a smooth, square face on the chamber end of the blank.
The blank is then turned end-for-end in the lathe and a chamfer is cut into the muzzle end of the barrel. This chamfer will later be used to couple my high-pressure flush system to the barrel while chambering.
After those steps, the new blanks are now ready for the next chambering batch, and the whole cycle starts over again!
In all honesty, what I have posted is not 100% accurate as to the procedures I go through to prepare the blanks. I have left out a few minor details and twists just in attempt not to show certain tooling or procedures. If some of you real gun-nuts or metal-heads see some anomalies in this post, that is why.

")