maybe this will help
I offered a while ago to put up some info on how I butcher my kills and I have finally got around to it. I also need to thank 30-06 for helping me collect the critter and for taking the pics.
This is how I do it and it may be different to how some of you were shown (and in fact I am sure it will be) but that doesn’t mean it is better or worse, just different.
Everything I do is to just get my meat into the freezer in as clean and edible a state as is possible. Doing it on the ground is a little different and not covered here.
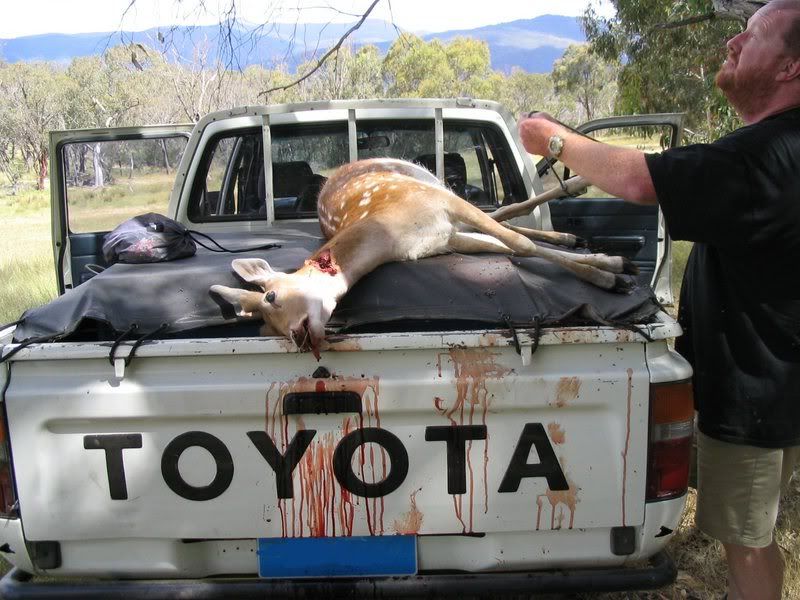
To get started you need to harvest your critter and get it hanging in a tree or off a suitable structure so you can get to work removing the bits to eat. If you use a gambrel hook you need to skin the legs from the hock up the leg to up past the gambrel tendon so you don’t have to work around the hooks to clean up your catch. I don’t use a hook but use some cord that I tie to the hocks to hold the animal up (in this example a deer) and the skinning can be done once the animal is hung. If you animal is a buck it is important to be sure to not handle the area around the scent glands on the hocks so that your hands don’t get the scent onto your meat later on.
Getting a buck up the tree.
Once you have skinned the area around the gambrel tendon you need not skin the rest of the legs, and most times I don’t as leaving the skin on helps keep the meat clean.
Next job is the belly and on a buck this means the pissel, and on a doe the teats.
Cutting the pissel away from the belly.
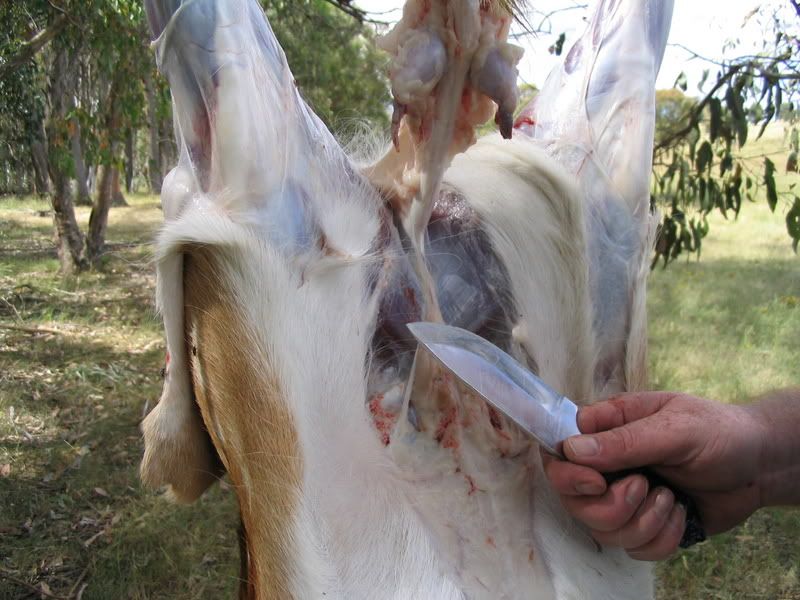
Then it is time to get in and cut the tendons that hold the rear of the belly onto the pelvis so that you can start to cut away the guts of your deer.
Showing where the tendons are that hold the weight of the guts.
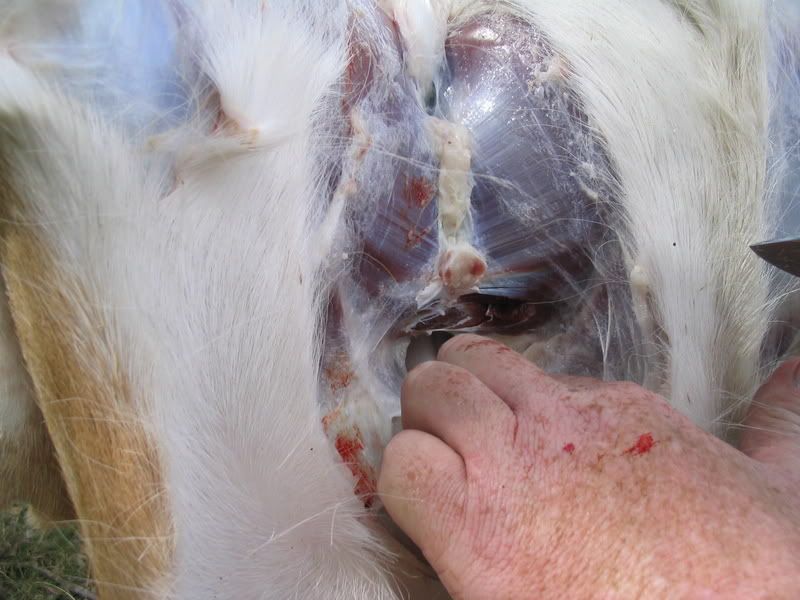
Once you cut these the guts will be putting their weight onto the flaps, which are the muscles that surround the guts. You can then start cutting from the groin out, being careful not to cut the legs but to cut the flaps in front of the groin. Try to cut the skin from the inside out so you don’t cut the hair and get it all over your meat.
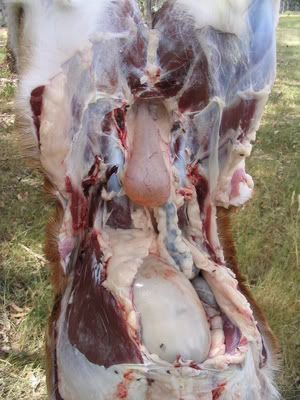
This is what you end up with.
Cut through the tail bone and around the bum and then use a boning knife to get in and core out the pelvis so you can pull the tail and the bum down through the pelvis. If the animal is big enough that you can get your hands and a knife up into the hole and grip (and hold shut) the top of the bladder then you can cut away the bladder with out spilling it and you can cut the pissel of at the bum hole and avoid pulling it down through your meat. The whole time you are trying to only cut connective tissues and not any meat as we want to keep the meat protected from bacteria as much as you can.
When you cut the flaps down to the ribs then you can cut the skin around the back and skin the shoulder area of the animal so you can get the shoulder loins and the front legs (if they aren’t bruised from your shot).
When you have skinned that area you can cut away the front legs by pulling them away from the body and cutting away the muscles that connect the shoulder blade to the ribs.
You can do the shoulders first up if you have a good double lung shot and they are going to be kept. Just cut away the skin on the front of the animal like you are caping for the taxidermist and then get into the butchering. Depending of course on whether you are keeping the skin you can be as careful or rough as you want, just try to not cut hair as it will always find its way onto your meat.
Once the shoulders are out of the road you can remove the shoulder loins and put them straight into your ice box.
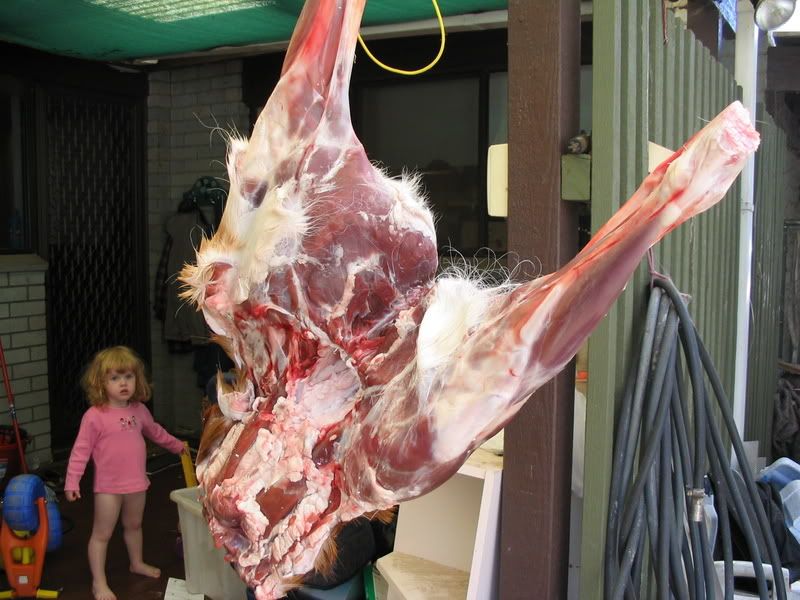
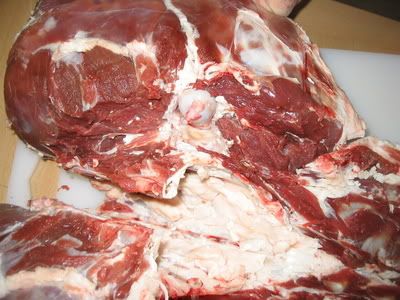
When you are at this stage you will have some back legs, the spine and a rib cage with a bunch of guts hanging off it. If you have cut your shoulder loin off back to the bottom rib then it is time to cut away the waste and get the meat into the ice box.
This is what you bring home on the bone.
You can hang your meat in a cool room like this or you can keep it in your ice box if it is big enough, and when you are ready you can get into the job of cutting it up for the freezer.
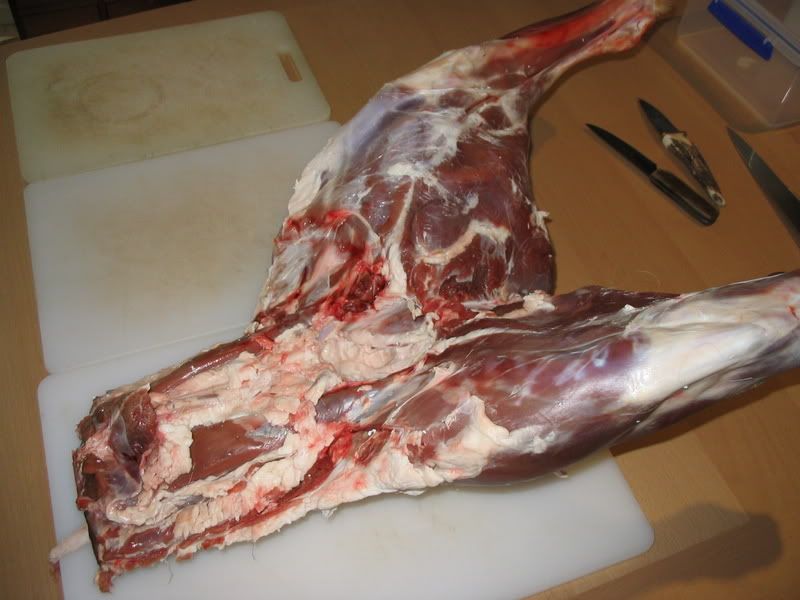
Get yourself a good size work area organised and you can get to work
The back end ready to go.
The first part I do is cut out the tenderloins from the spine.
The tenderloin cut from the spine.
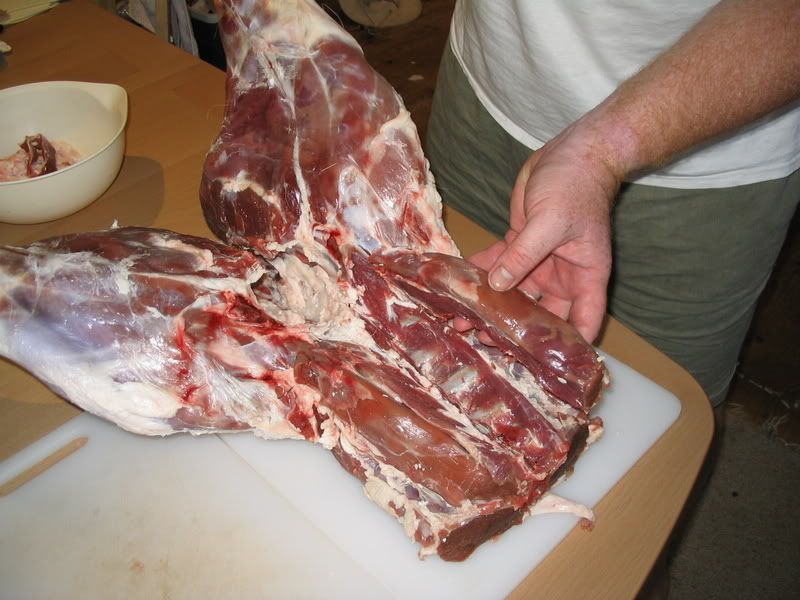
The next part I do is cut away the rump and the leg from the pelvis.
Cutting along the inside of the pelvis
Cutting along the outside of the pelvis.
You cut the meat away from the pelvis bone and then you put some pressure on the leg joint and separate it from the pelvis.
The hip joint exposed
What you have when you finish this part
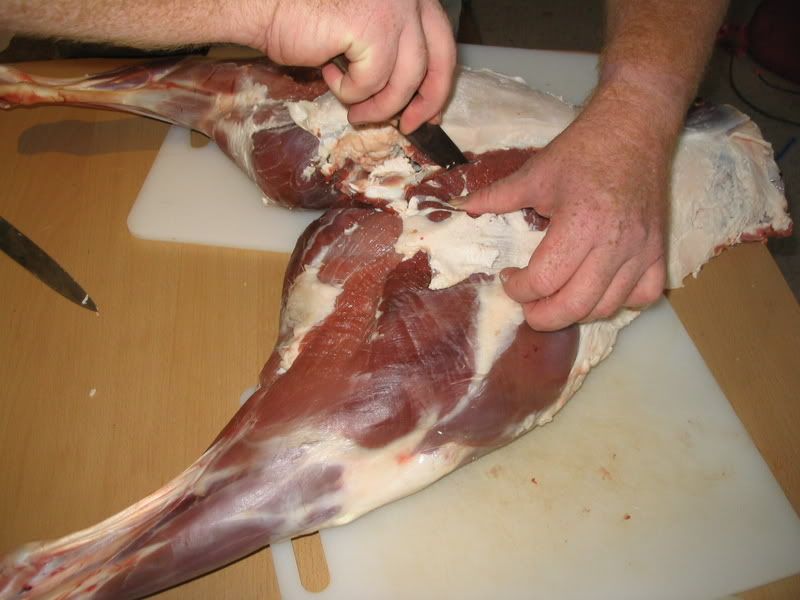
Cut straight down from the hip and remove the rump, then just keep cutting in the same plane to make your rump steaks, or if you like just put it aside for freezing as a rump roast (not my preference).
Next are the loins (the part made into chops). I cut them away and slice them into steaks about 20mm thick.
End view of the loins and spine.
First cut the loins from the back.
Then from the side.
Then repeat the process to remove the other leg and loin.
Now you are good to go on the legs. Put the leg down with the inside up and start by feeling for the gap between the muscles where you can feel the leg bone goes. Cut the meat down to the bone and along the whole bone.
The first cut on the leg
You will notice that one side of the leg is shorter and rounder than the other and that is the side that I cut off first. Just roll it away as you cut the meat from the bone and you will be left with a softball size roasting piece.
Rolling the meat off the bone.
The roast.
Then you can get to work on the other half of the leg.
I cut this part into steaks. Sometimes I just cut them into steaks right off the bone.
Well, that’s about it. The bones are cut up a bit and put into a pot to make stock (you could feed them to the dog if you like), and the meat is all put into containers for freezing.


![url]](http://[url=http://img.photobucket.com/albums/v243/jindydiver/rumpandleg.jpg t=_blank]http://img.photobucket.com/albums/v243/jindydiver/rumpandleg.jpg[/url])
![url]](http://[url=http://img.photobucket.com/albums/v243/jindydiver/loinendveiw.jpg t=_blank]http://img.photobucket.com/albums/v243/jindydiver/loinendveiw.jpg[/url])
![url]](http://[url=http://img.photobucket.com/albums/v243/jindydiver/loincut1.jpg t=_blank]http://img.photobucket.com/albums/v243/jindydiver/loincut1.jpg[/url])
![url]](http://[url=http://img.photobucket.com/albums/v243/jindydiver/loincut2.jpg t=_blank]http://img.photobucket.com/albums/v243/jindydiver/loincut2.jpg[/url])
![url]](http://[url=http://img.photobucket.com/albums/v243/jindydiver/beginboning.jpg t=_blank]http://img.photobucket.com/albums/v243/jindydiver/beginboning.jpg[/url])
![url]](http://[url=http://img.photobucket.com/albums/v243/jindydiver/boning2.jpg t=_blank]http://img.photobucket.com/albums/v243/jindydiver/boning2.jpg[/url])
![url]](http://[url=http://img.photobucket.com/albums/v243/jindydiver/roast.jpg t=_blank]http://img.photobucket.com/albums/v243/jindydiver/roast.jpg[/url])
![url]](http://[url=http://img.photobucket.com/albums/v243/jindydiver/boning3.jpg t=_blank]http://img.photobucket.com/albums/v243/jindydiver/boning3.jpg[/url])
![url]](http://[url=http://img.photobucket.com/albums/v243/jindydiver/legsteak.jpg t=_blank]http://img.photobucket.com/albums/v243/jindydiver/legsteak.jpg[/url])