
STUMP49
New member
Now all I have to do is get out and use them.
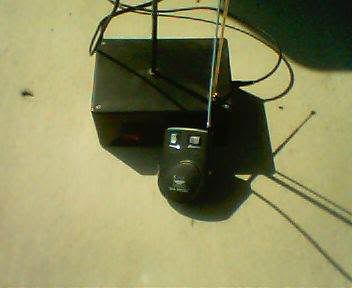
Box and remote
Expedite Dove

Expidite Woodpecker

PARTS AND WIRING.
1. YOUR R/C BOARD
2. 274-248 panel mount mono 1/8 phone jack...(2)
3. 275-690 on-off switch...(1)
4. 270-386 d battery tray...(2)
5. your decoy
6. 270-1806 project box...(1)
7. 42-2387A cable...(1)
8. 278-1610 heat shrink tubing.....I used this instead if elertic tape.
I used a carbon arrow w/ 1/2 inch dowel rod to mount the decoy.
Plastic tube for the antenna should come on the car.
velcro stick back...at walmart...90973 or the last 5#s on the upc code. You need this to stick the two dD battery trays to the side of the project box.

I added a charging port so I can use a wall charger to recharge my rechargeable batteries.
So now I wont have to take the cover off.
Part I used for my charger was radio shack
Size M panel mount coaxial DC power jack....274-1563
Box and remote
Expedite Dove
Expidite Woodpecker
PARTS AND WIRING.
1. YOUR R/C BOARD
2. 274-248 panel mount mono 1/8 phone jack...(2)
3. 275-690 on-off switch...(1)
4. 270-386 d battery tray...(2)
5. your decoy
6. 270-1806 project box...(1)
7. 42-2387A cable...(1)
8. 278-1610 heat shrink tubing.....I used this instead if elertic tape.
I used a carbon arrow w/ 1/2 inch dowel rod to mount the decoy.
Plastic tube for the antenna should come on the car.
velcro stick back...at walmart...90973 or the last 5#s on the upc code. You need this to stick the two dD battery trays to the side of the project box.
I added a charging port so I can use a wall charger to recharge my rechargeable batteries.
So now I wont have to take the cover off.
Part I used for my charger was radio shack
Size M panel mount coaxial DC power jack....274-1563
Last edited: