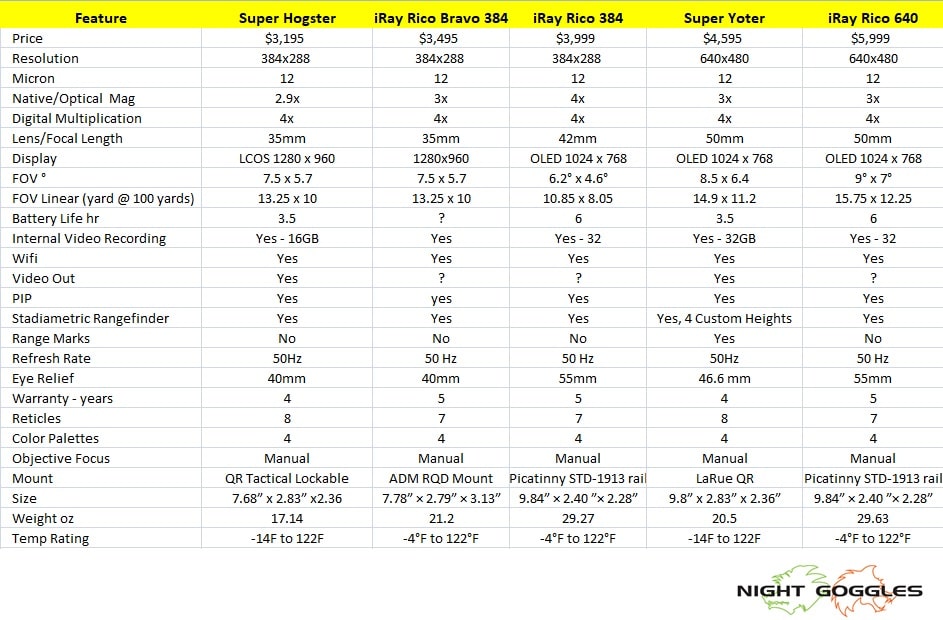
Originally Posted By: DarknightI forgot about the xg50, thanks for that. I didn't see a horizontal FOV listed at that link. Do you happen to know what it is Ernest? Ernest is correct the XG50 is the 640, 12µm Thermion unit. If you already have a Thermion and like the controls and batteries and want more magnification, it seems like a logical choice. It has the BAE sensor in it vs ULIS. Per the link Ernest included, if you click on Full Specs, it lists it as 8.8x6.6. This is very similar to the other 2 units you are considering.
Originally Posted By: DarknightI'm also curious how the range marks work on the Super Yoter. How simple is the process of bringing up those range marks or the stadiametric range finder with an incoming coyote? Are range marks and the stadiametric range finder two separate things? The Stadiametric Range Finder and Range Marks are two separate things but they have some commonality. First, there is a Settings window shown below. Here you have the ability to set any of 4 heights. They show 4 animal types but you can set a deer to a prairie dog if you want. In this example, I used .6 m which is almost 24". I believe this to be a little tall for ground to shoulder on most coyotes. It seems like most adult coyotes are probably around 20", so I would probably use .5 m. The size you set adjusts the heights for both the Stadiametric Range Finder and the Range Marks feature for these 4 values. This is also where you set the range for the Range Marks Feature. Whatever setting is selected when you leave this configuration window is the height and range that will be used for Range Marks.
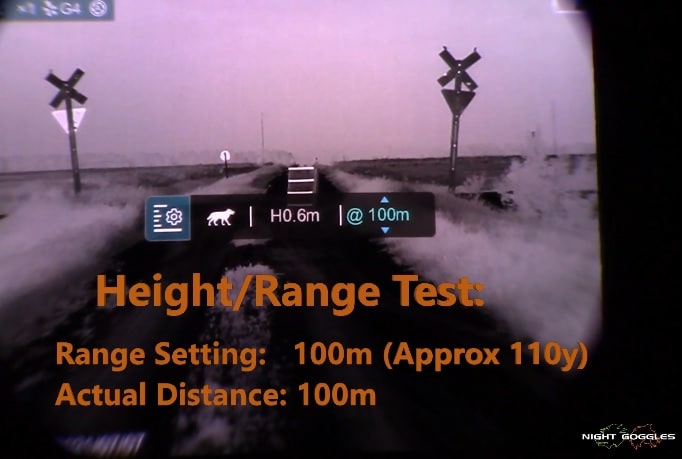
Once this is set, this new height for a coyote will impact both the Range Marks feature and the Stadiametric Rangefinder.
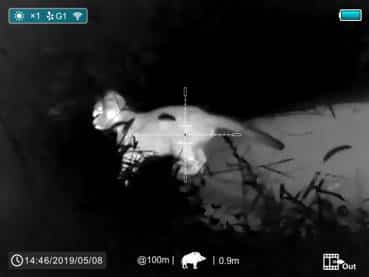
You can bring up the Stadiametric rangefinder by pressing the last two buttons together. It can be adjusted in this window. The reason why I recommended Bering to add Range Marks, is the rest of the features of the scope can't be adjusted when in the Stadiametric Rangefinder. You can shoot, but you can't zoom your scope, hit record etc because the buttons are used to adjust the rangefinder.
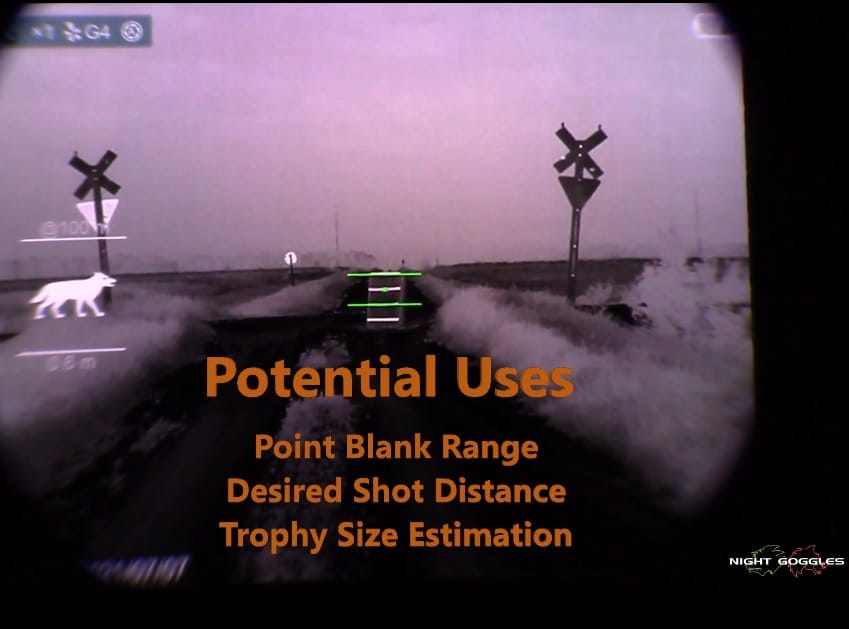
If you press the last two buttons again, it brings up the Range Marks Feature shown below.
Bering has made these lines about 75% smaller as they take up too much space in my opinion when this wide. They have also made the icon on the left, small and placed it on the bottom. At least, this is what I have been told and was sent the image below.
The beauty of this is your scope can function as normal. If you digitally zoom, the area between the lines changes dynamically, so it requires no additional adjustment. For right now, I have to activate it each time I start a stand. I have asked Bering to save if the Range Marks are activated, so it could appear every time you turn the scope on. I do not know if it made the final release, but I believe so.
The lines are the same color as the reticle color you choose. The thought process behind this is to use it for either Point Blank Range (PBR) or for a target distance. If you set it to your PRB, you will know just by aiming at a coyote if it is within your PBR. If you are using it for Target Distance, same idea, if you want to shoot a coyote at 100 or 150, etc, just set it and when the coyote is about the size of the range marks, stop them, and shoot.
I have recently found out that Sightmark has incorporated a similar feature in the Wraith 4K Max. However, when it is activated, it doesn't allow the user to zoom and some other scope functions are inactivated. I like the ability that range marks are just there providing range-finding abilities without impacting any other features of the scope.