nice..
I found that keeping an eye on pawn shops and craigslist (craiglook.com, it searches all listings around, I am willing to drive a little for the right tool, and price)
If you want to do the same, start with an upgraded chainsaw. The biggest you can get. I have a husky Rancher, and wish i had a larger one. I also recommend a rip cut, thin kerf chain. That will save hours of milling, and lots of board feet of lumber.
I have an Alaskan mill. It's nice, and handy for onsite. I made a ladder out of lumber that gets screwed onto the trunk of the log. (check for straightness (distance from center growth rings) then screw that down really good, the more time you spend making that right the easier the rest of it goes) I then prop one side up in the air, so that gravity will feed the saw into the cut. (make sure to turn the oiler up all the way on the saw)
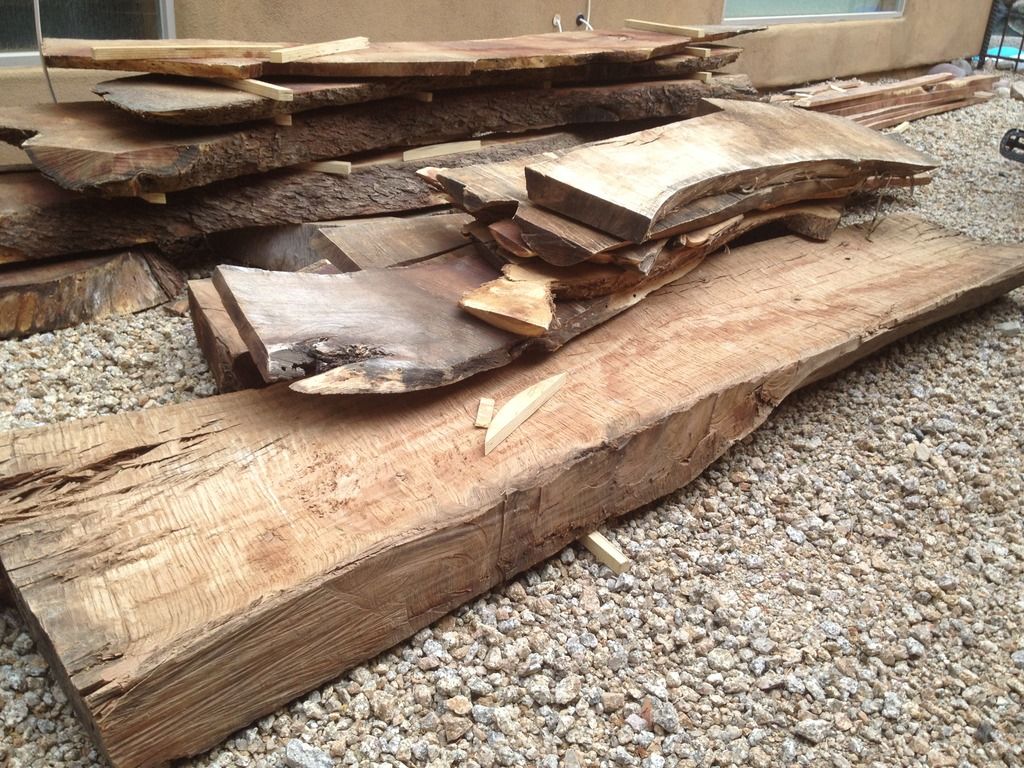
I cut the beams as soon as i can, into 3"x12.5" by as long as you want. (any longer than 6-8' becomes really heavy and a pain to work with. I also get the opps paint at home depot, any color will work and slop a thick layer on both ends of the log. (keeps the checking and cracking down. You will also get a more even dry over time)
Stack with strips between so that air can circulate.
I cut the logs in the opposite of quarter sawn. It make seem wierd, but The only beam that is quarter sawn is the center cut. (the cuts i do are set around that middle beam being the 3"x12.5" wide by 8' long.) I do this because most of the time the lumber i need is less than 3" Once everything is dry, i take the large beam and put it on the band saw, and slice off the pieces i need, then the grain is all going the right direction and stacked giving you the quarter sawn look. (trial and error)
I cut them 3" thick because It's easier to work with and i can use the table saw, or skill saw to slice them. I might start cutting them 4.5" thick since most of the time i cut them on the band saw. They just get really heavy that way. (it's all about trial and error, and what works for you)
The tools you should have if you want to make your own lumber are.. 14" band saw and at least a 3/4 horse motor with a 20 amp circuit and the best blades you can afford. I like the silicone coated ones. Also if you can, get a lift kit so that you can handle taller material. (not needed but nice to have)
Good long joiner is a must. I found a old Cast iron Delta 6" wide one at an estate sale for $200. Done.. All day.. The trick is that you must get the blades sharpened, having a pro sharpen and set the blades is a time saver. (keep your eye on them, some of them will try and set the blades above the outfeed table, you will never get a flat edge if the blades are not perfectly level with the outfeed side.
Surface planer. Bigger is better, way better.. I ended up upgrading to a Dewalt 735 13" heavy duty planer. This thing is loud, and makes a ton of chips. Fast. I have a jar that i put the money from selling projects in to fund the tools. The next item on my list is a Helix blade for the planer. It take the stain off the motor, and each carbide blade (i think there are like 40 of them) are only $15. When one goes bad you just pop it off and screw in the next rather than replace all three others at $65 a pop. When you get close to the final thickness, smaller passes are a must. That planer will tear out a chunk and totally mess up a board as fast as you can blink.
Carpenter table saw. You will never get great results with a table top. Ridgid makes a good one and it's super quiet, and rolls.
Dust collection, get one. These tools make a ton of chips, surface planning will fill a 35 gallon trash can in a couple of hours. (make a seperator for the top of it, )
One of the biggest money savers for me was a metal detector.. I find bullets and nails in all kinds of things. I can go to the forest and cut a tree, get home and before i start milling (each pass) run the metal detector and find bullets all the time, in just random tree's)
Do bullets mess up saws and blades, no, but they will put nicks and feed that into your planer and you will spend $65 on a new set of blades because of a copper jacket putting a knick in you blade. lesson learned the hard way.
Hope this helps.
I get the tree's from tree timmers.. I give them a case of beer for dropping off a log over 12" in diameter. (i started at 10" but then had to much and to make it worth it, it needs to be bigger) That, and I had more tree's than i knew what to do with. One month i had 2000 bf of lumber. It was a massive stack all stacked carefully so that each pile was book matched all the way through. I put up some ads on craigslist and sold a lot of it for $8/bf I had to cut back on the tree trimmers. They pay by the weight at the dump and cutting it up takes time, and wear on the tools. Dropping it off at my house, saved cutting time, wear on the tools, and saved on dump fee's.
I came home once to Eucalyptus tree that was 36" across, and 3 8' long logs. That took a lot of time to cut up, and that stuff is incredible hard. At least twice as hard as Oak. beautiful long lasting tough wood.. But wow is it hard. This is when i upgraded to Blued steel chains for the chainsaw. I still had to sharpen the chain after every other tank of gas.

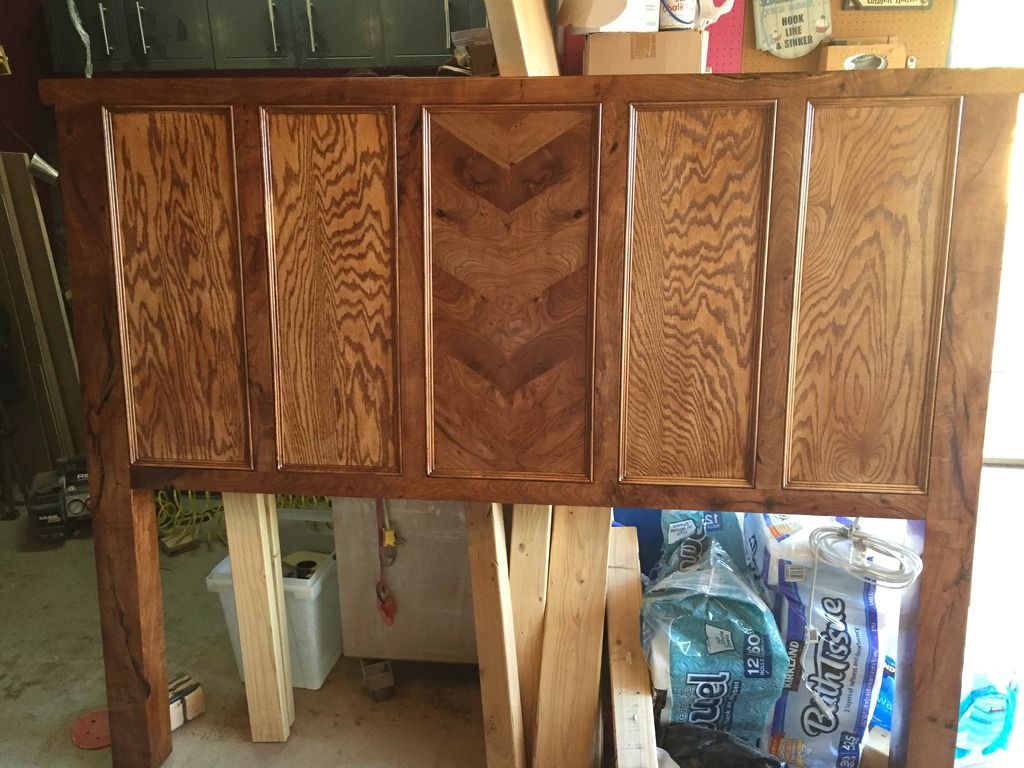
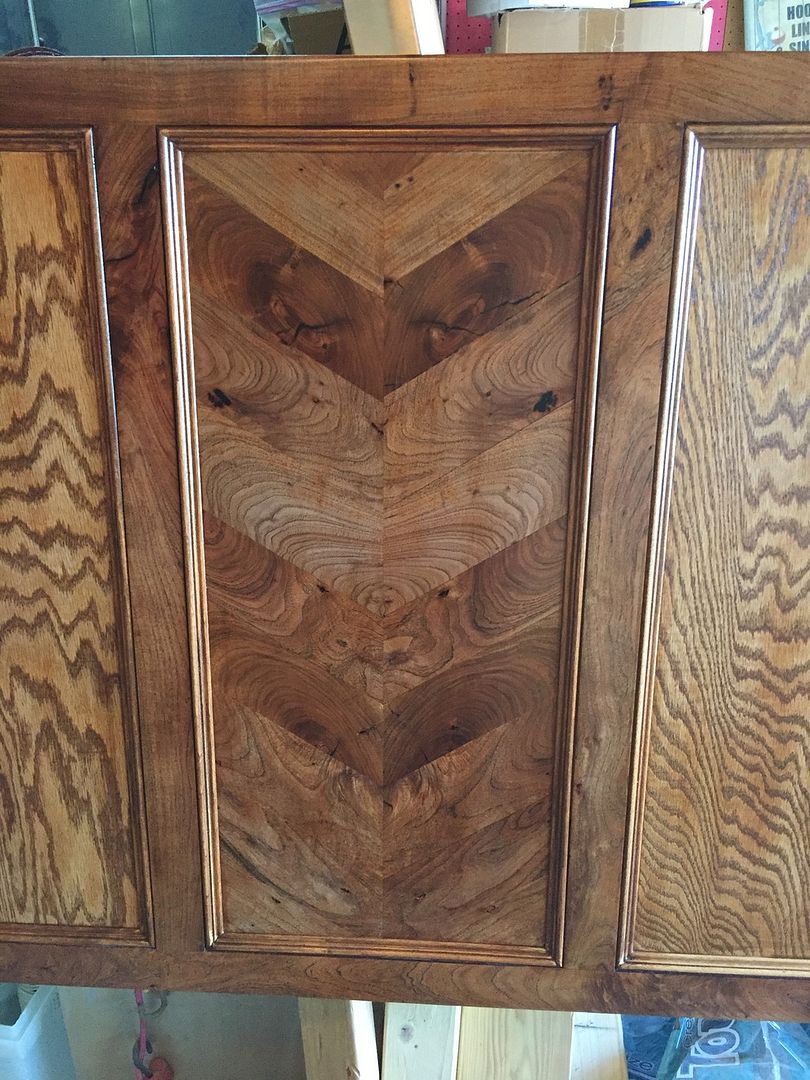


 i would only give myself a B- since the heiring bone points didn't match perfect all the way up..