

Victor_TNVC
New member
These are the independent testing results, performed by TNVC. The purpose of this testing was to weigh the performance of the DBAL A3 Class 1 in real life conditions.
*All photos posted below are of the DBALA3 Class 1 performing.
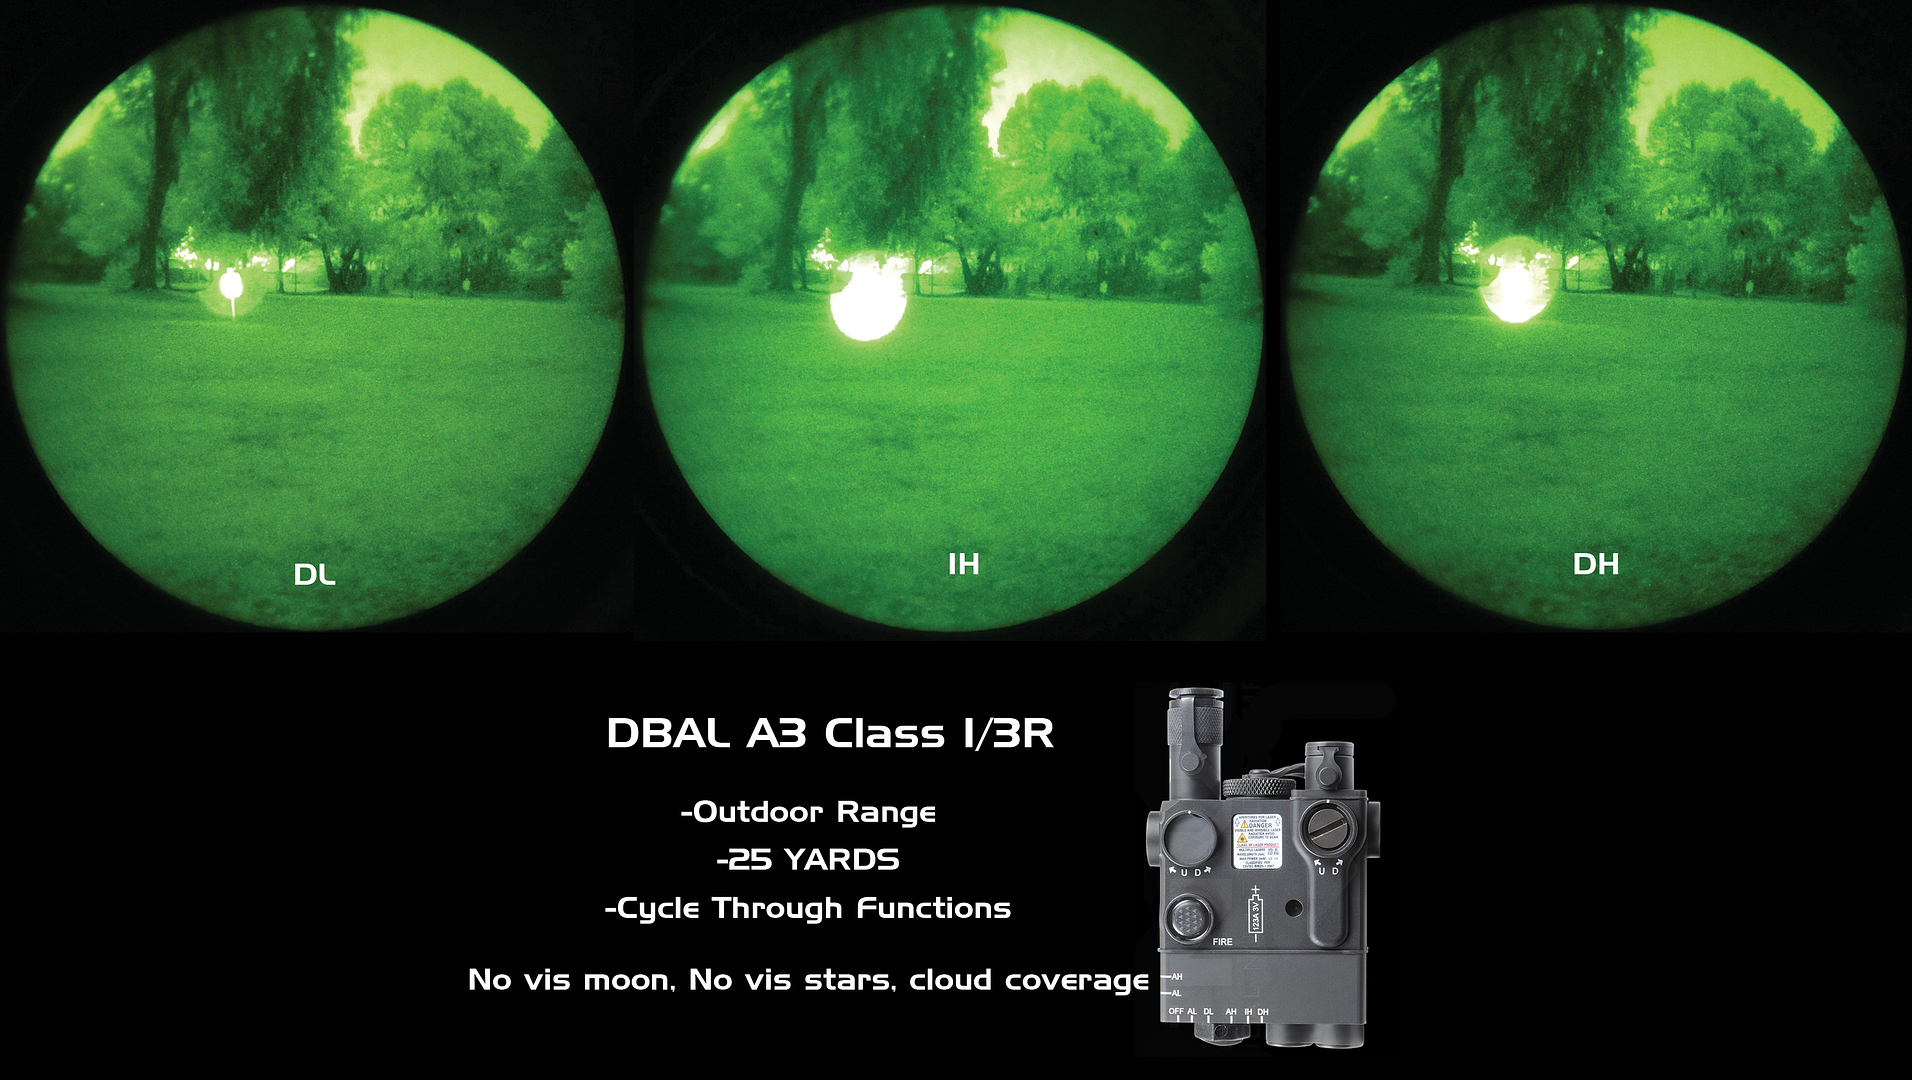
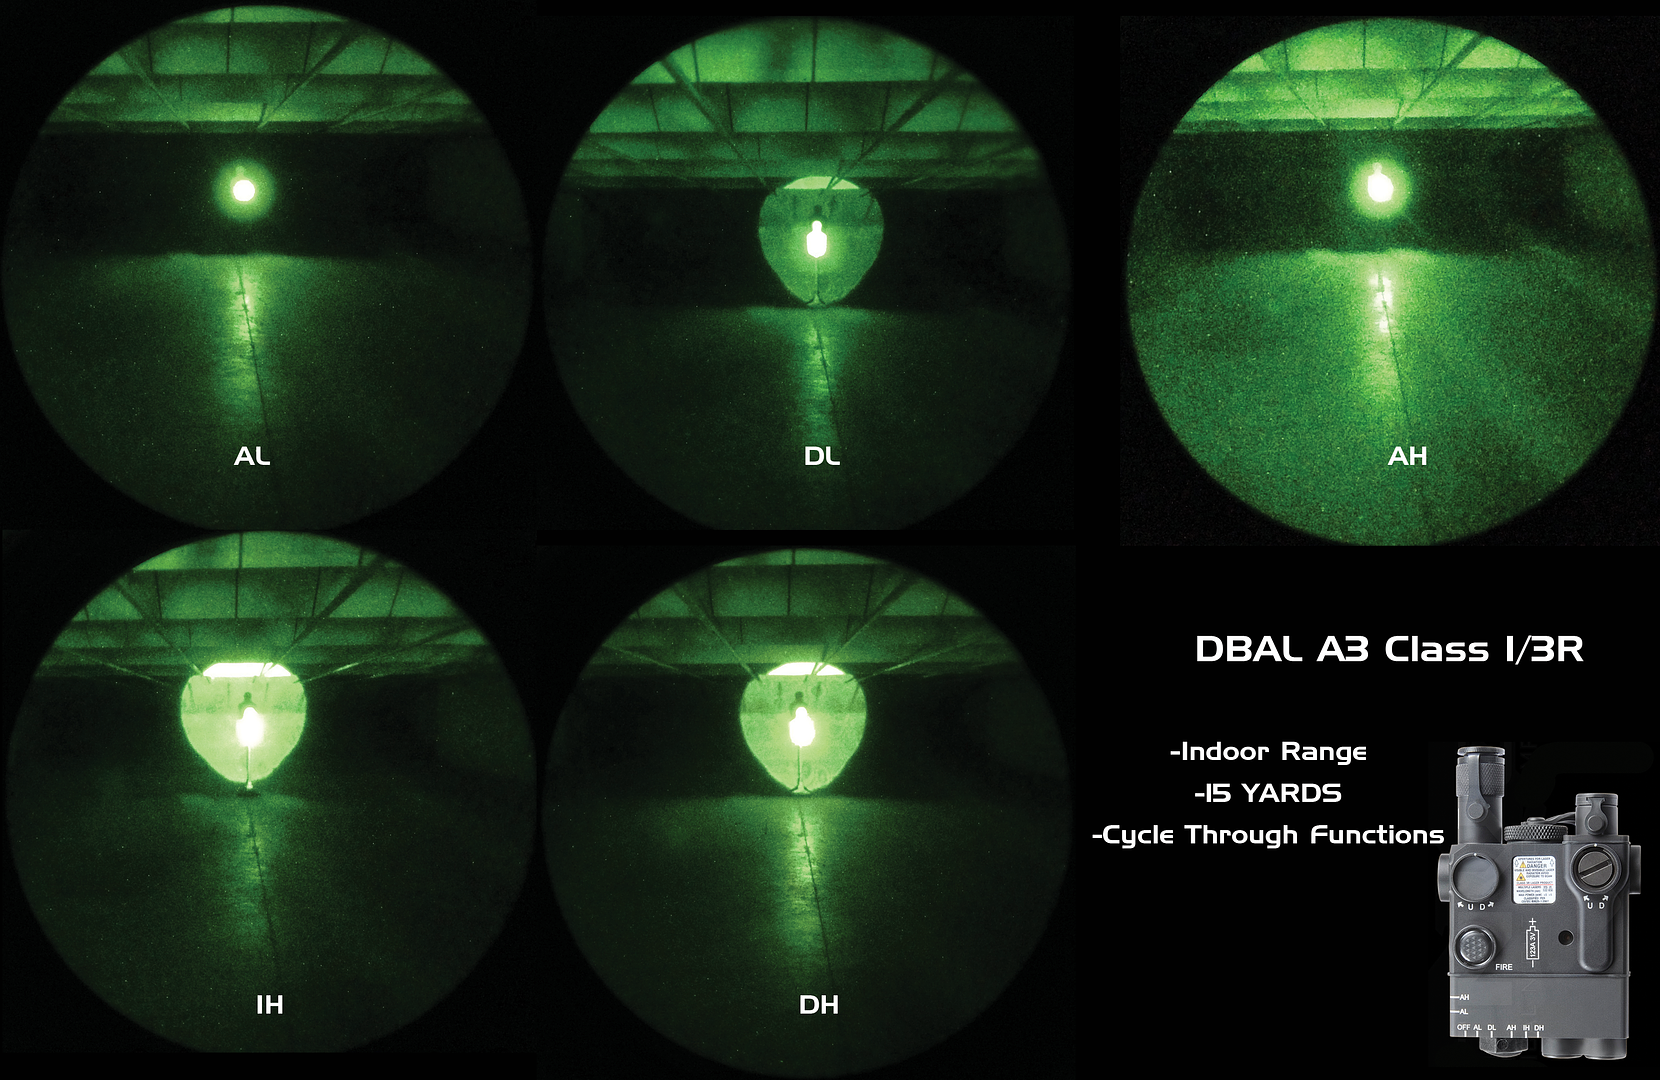
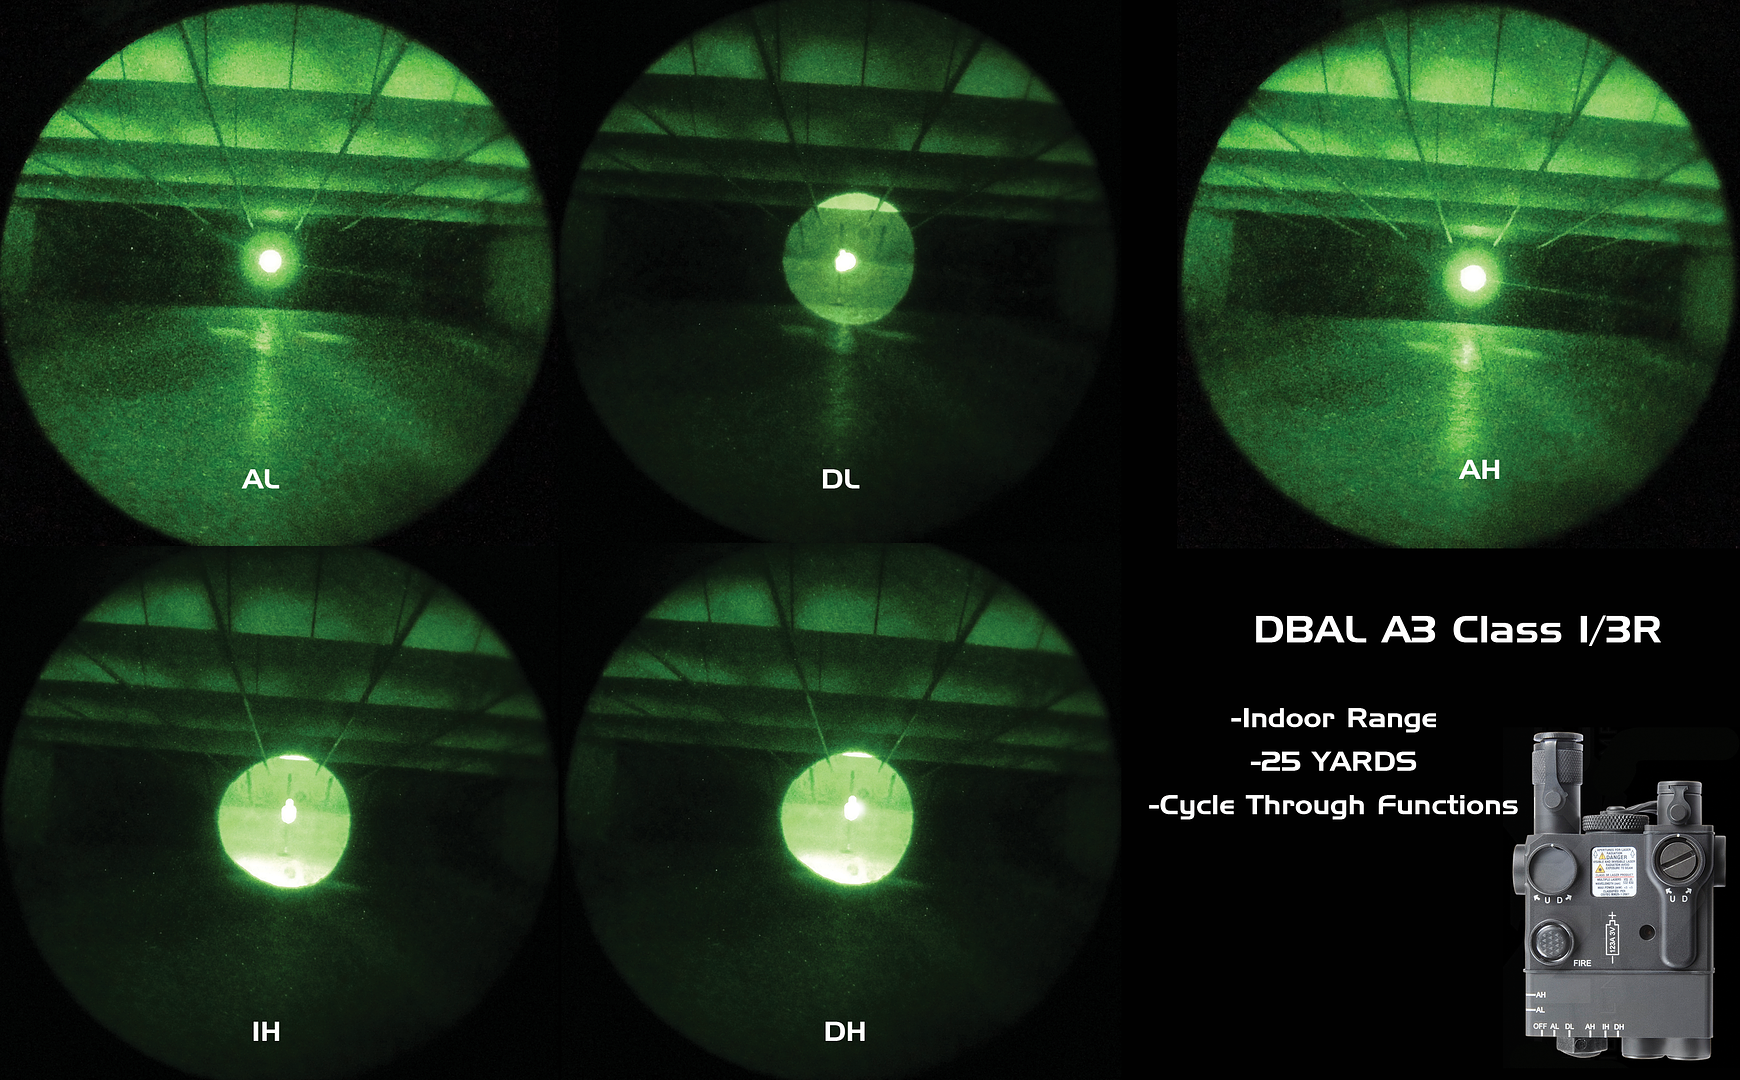
In the photos below you will see two letter annotations on most through the tube photos at distance. They are labeled that way to be able to convey which function was being used at that time. The chart below explains what the two letters mean.
AL- Aiming Laser Low Power
DL- Dual (IR Laser and IR Illuminator) Low Power
AH- Aiming Laser High Power
IH- IR Illuminator High Power
DH- Dual (IR Laser and IR Illuminator) High Power
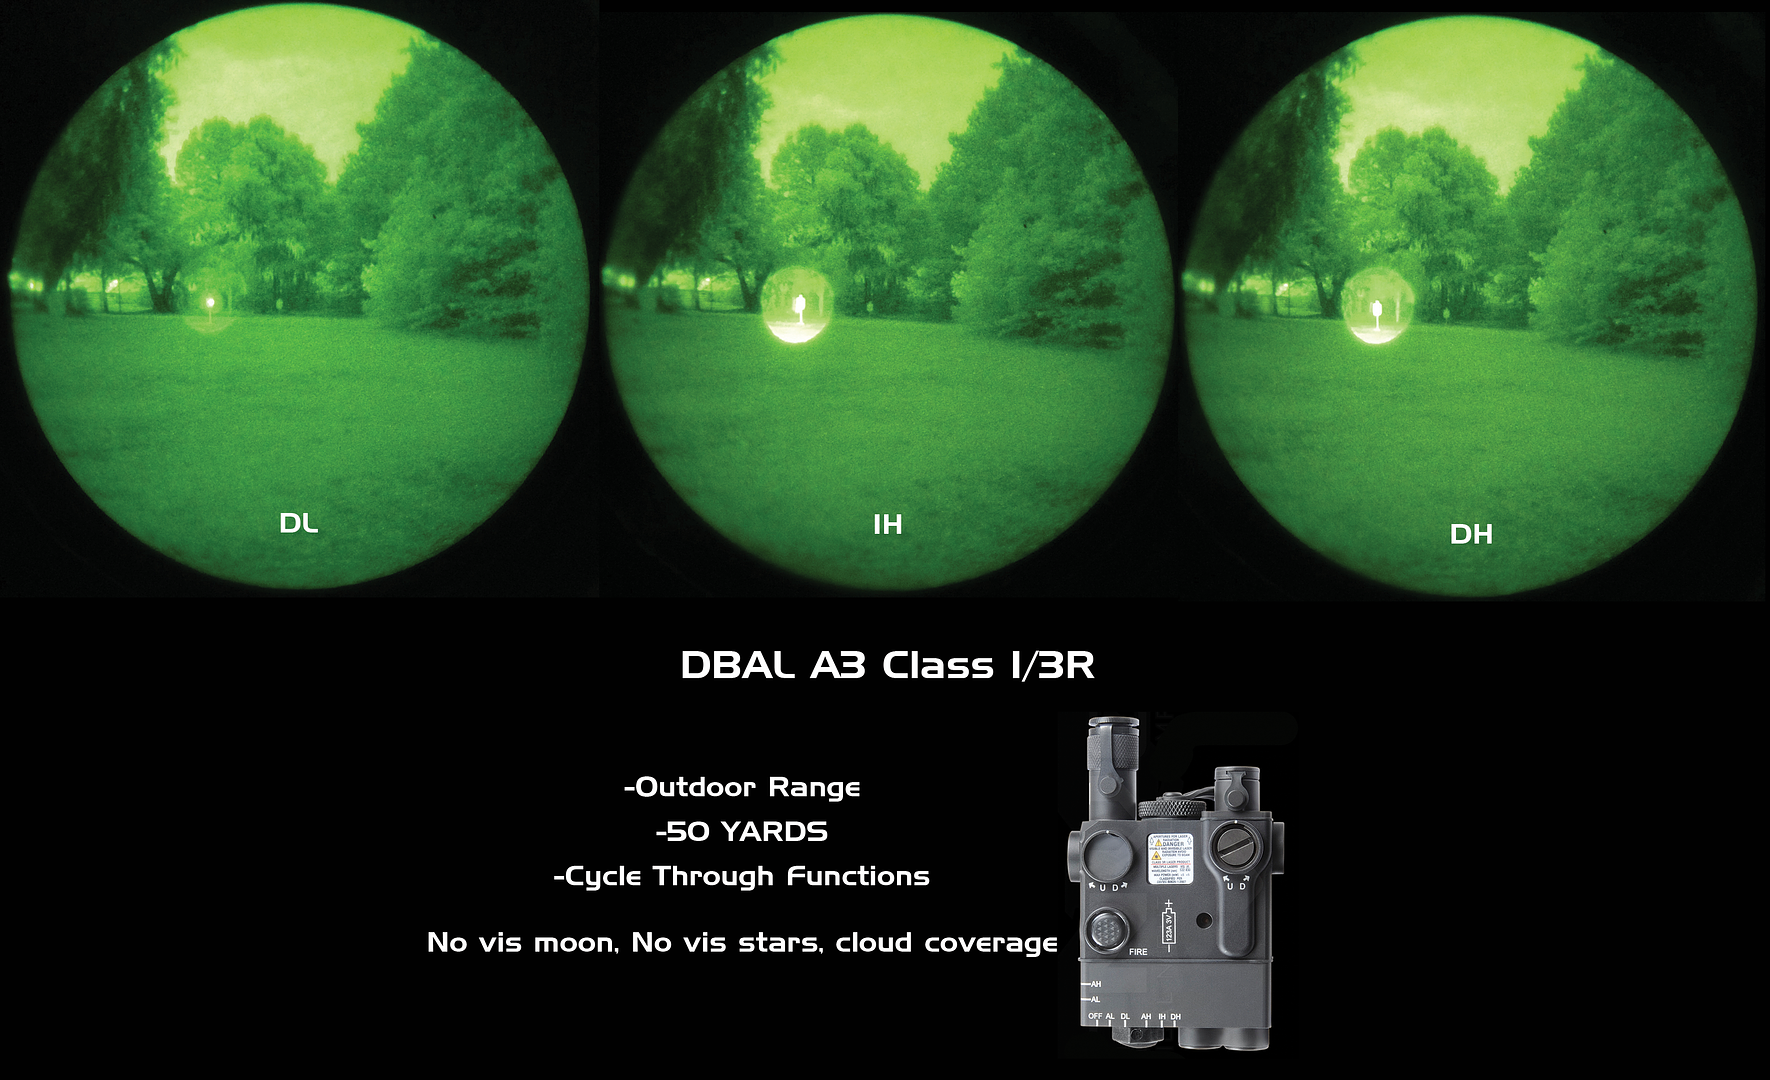
OUTDOOR TESTING
These photos were taken in a somewhat secluded area. There was no visible light within the vicinity, and the conditions were no stars, no moon, heavy clouds. The lighting you see on the horizon is from a car processing center located at one of the ports approximately 1 mile away There is a good amount of marsh separating that distance as well. The light is being refracted from the heavy cloud coverage.
The photos below do not show the IR laser Low Power or IR laser High Power. The reason is because I couldn't tell a difference on the settings with my eye, and certainly couldn't tell the difference in the photos.
 [/span]
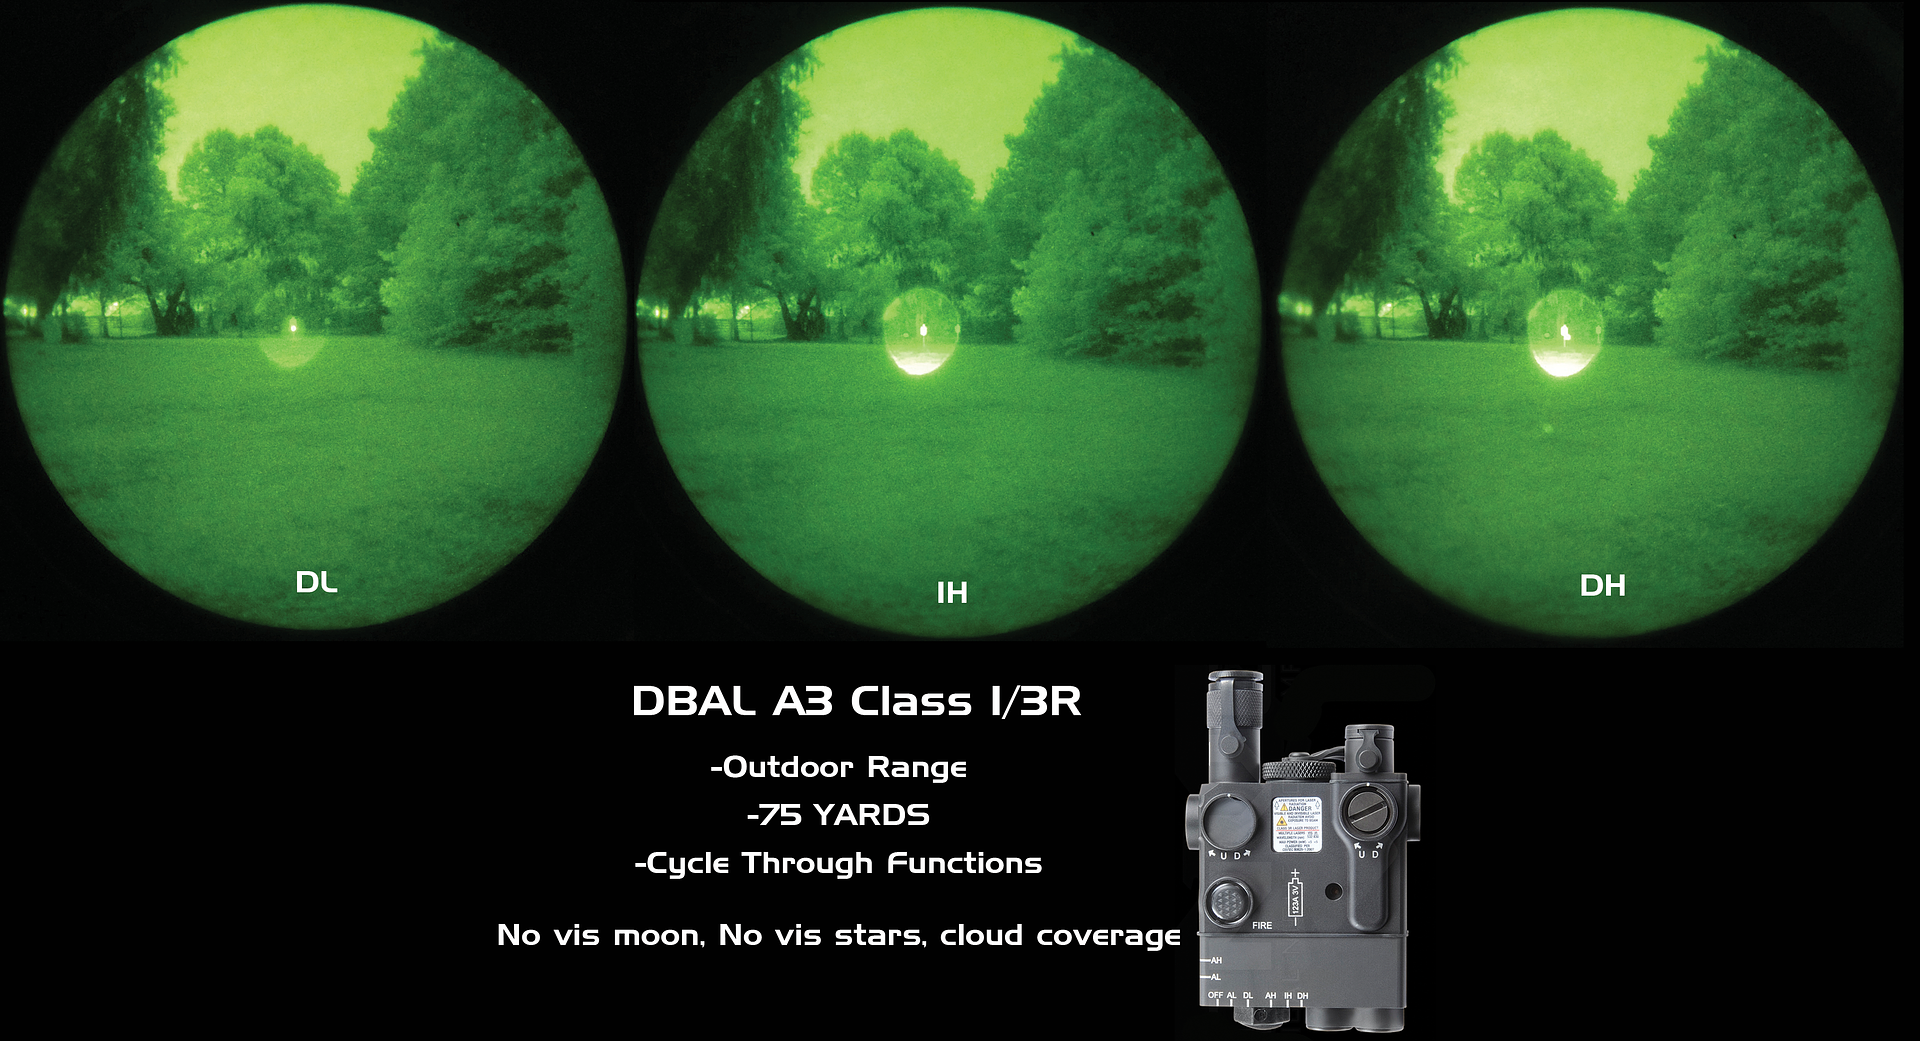
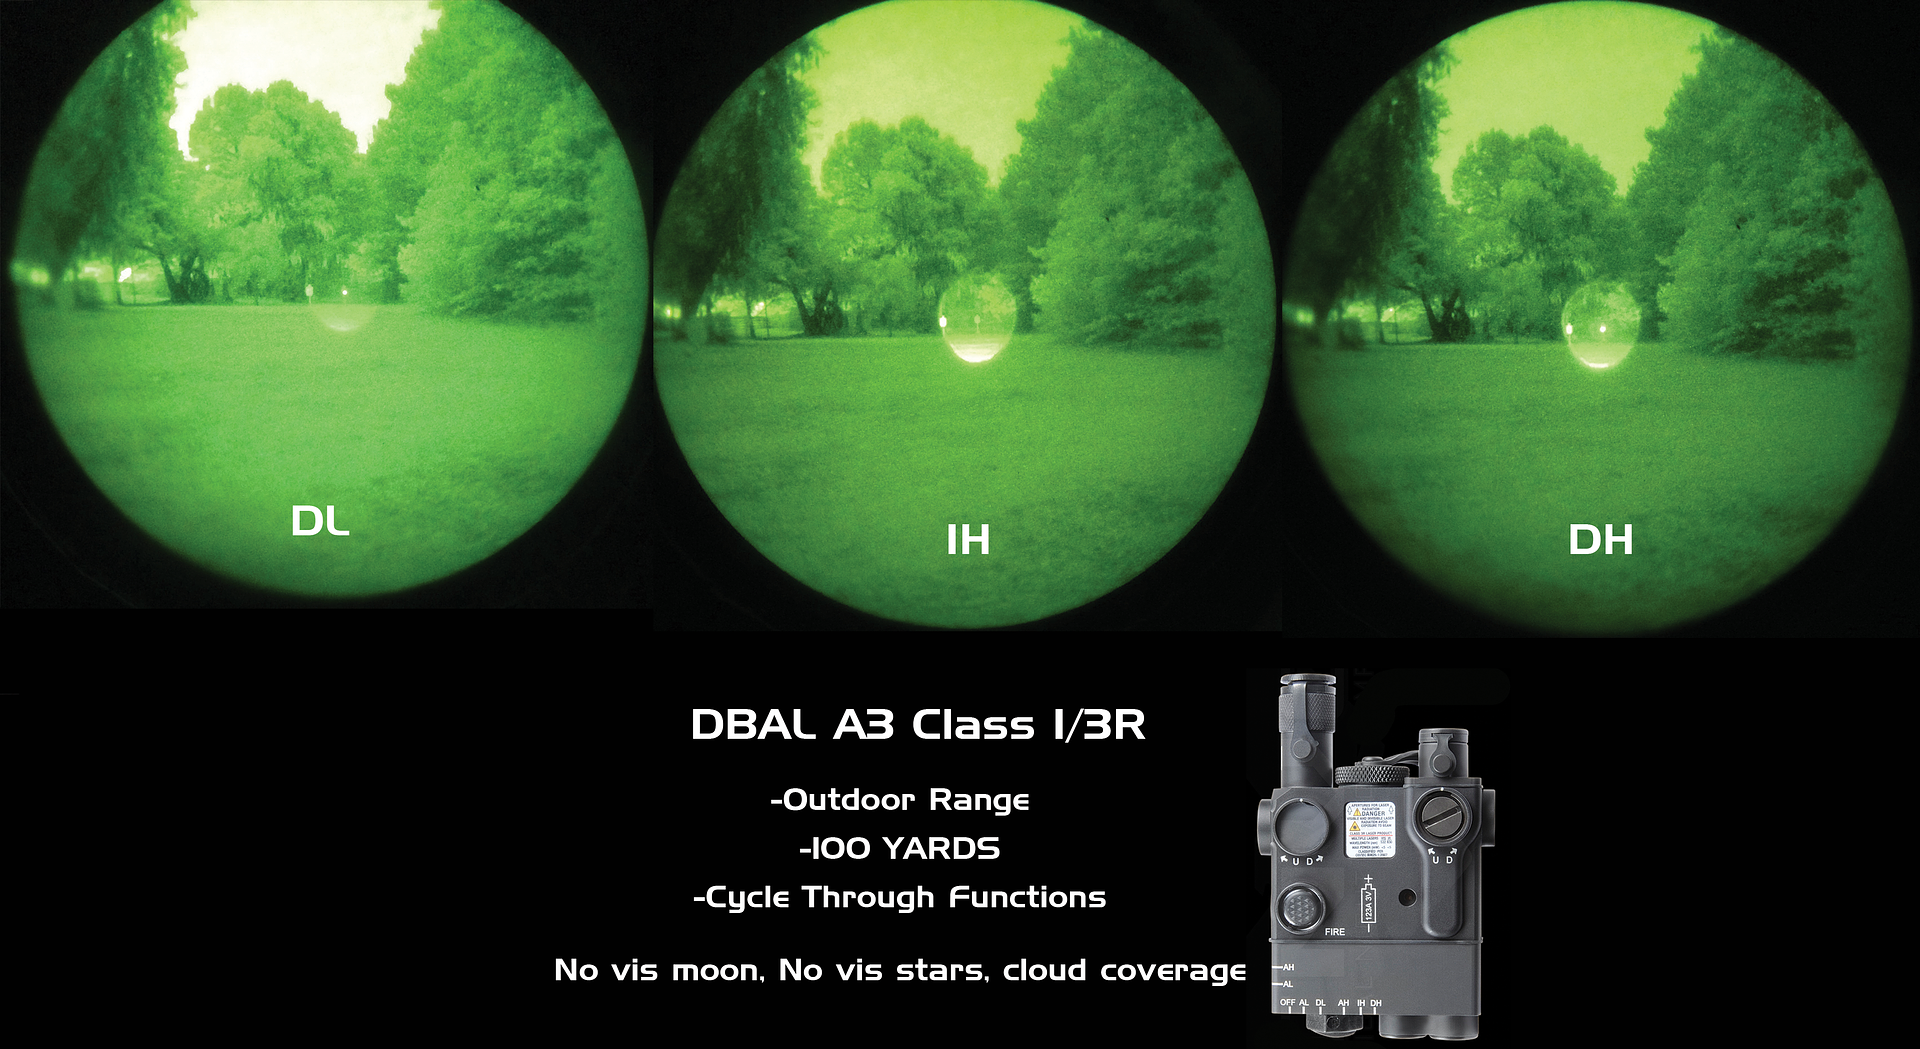
The furthest I am comfortable with saying is an effective range of the IR illuminator is 150-175 in it's narrowest form.

INDOOR TESTING
All of these photos on the indoor test, were taken on the live fire range at Telluric Group’s training facility.This facility is optimized for low light/ no light training and the lighting can be controlled very precisely. The conditions in these photos are – no lights on whatsoever. The only visible light was the glow in the dark tape on the ranges light switch module, and the LED on the coffee machine in the classroom outside of the range, approximately 50 feet away, and on the other sideof the bullet proof observation windows looking into the range. It was"can’t see my hand in front of my face” dark.
The above photo somewhat represents the usefulness of having a HI/LO setting on the IR illuminator. In most cases you would want to adjust your illuminator into it's widest setting possible, and put it on a low power setting when using in short range indoor environments. Notice house the High Power photo washes out the rest of the IPSC target that is resting on, and how you can see a good remaining portion of the IPSC target on the low power setting. This is very important for law enforcement/military/home defense, because too much IR light CAN and WILL wash out the person you're interrogating with IR light, and you won't be able to identify if they are friend or foe. Again, this is not a 1:1 representation because the IR light is a bit saturated.
The IR illuminator is just as visible on this laser as it's restricted counterpart, and by that I mean just barely. It’s hard to see, unlessyou are standing DIRECTLY in front of the unit, looking DIRECTLY into the emitter, which I DO NOT RECOMMEND. The faint red dot is hard to see and this isprimarily because the emitter is recessed into the housing. The photos below,were taken with my iPhone 5, at a distance of 15 yards in pitch black conditions.

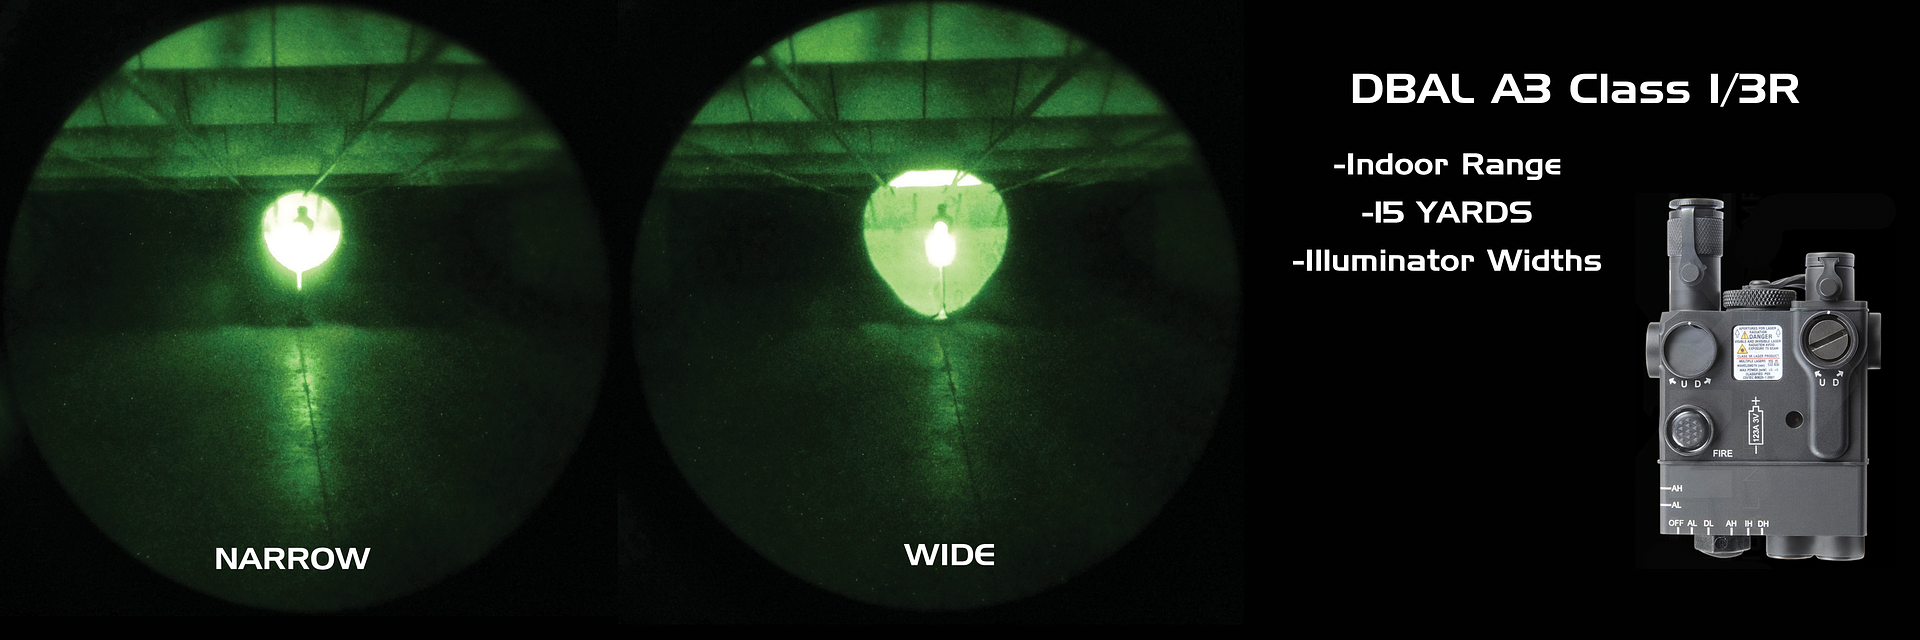
IR ILLUMINATOR WIDTHS
The IR illuminator in it's narrowest form has a measurable spread of roughly 3 foot at 15 yards. In its widest form has a measurable beam of 5 foot. This means at 25 yards 5 feet (narrow) and 9 feet (wide), and so on.
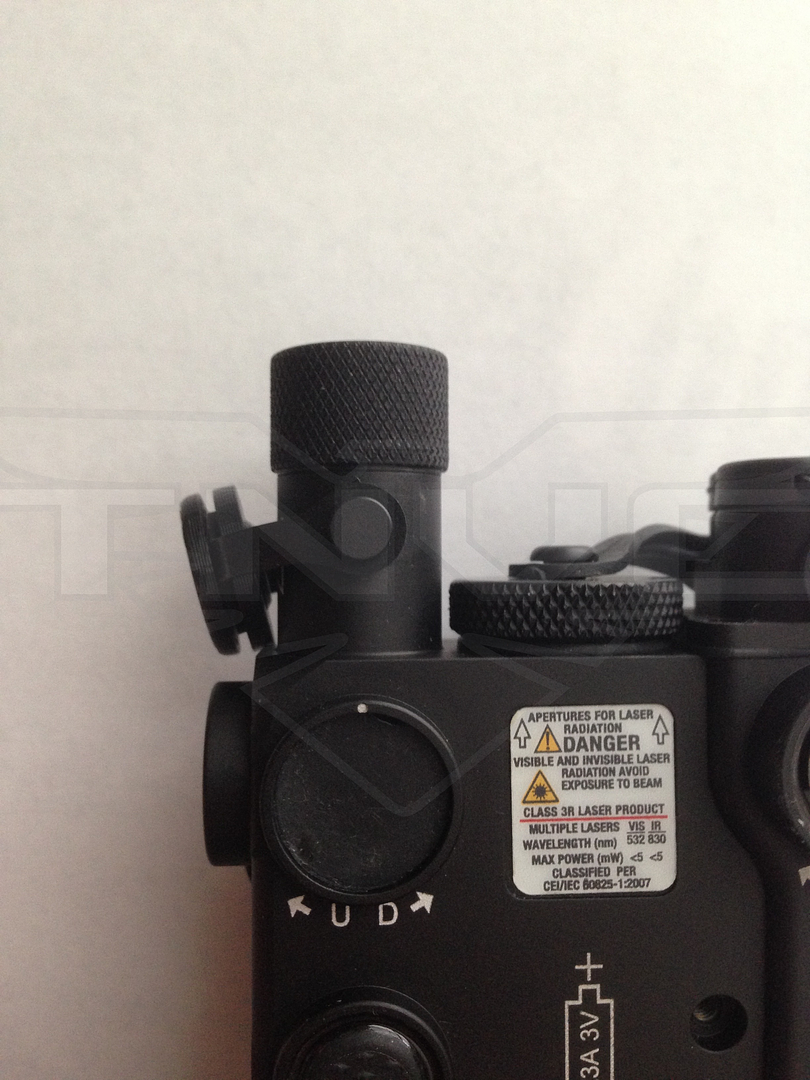
AESTHETICS
The exterior of the laser is identical to it's restricted counter-part, the DBAL A3 with the exception of not having the ability to zero or align the IR illuminator.
In the photos below, you can see it's size compared to the DBAL I2, and how the rear controls are different.
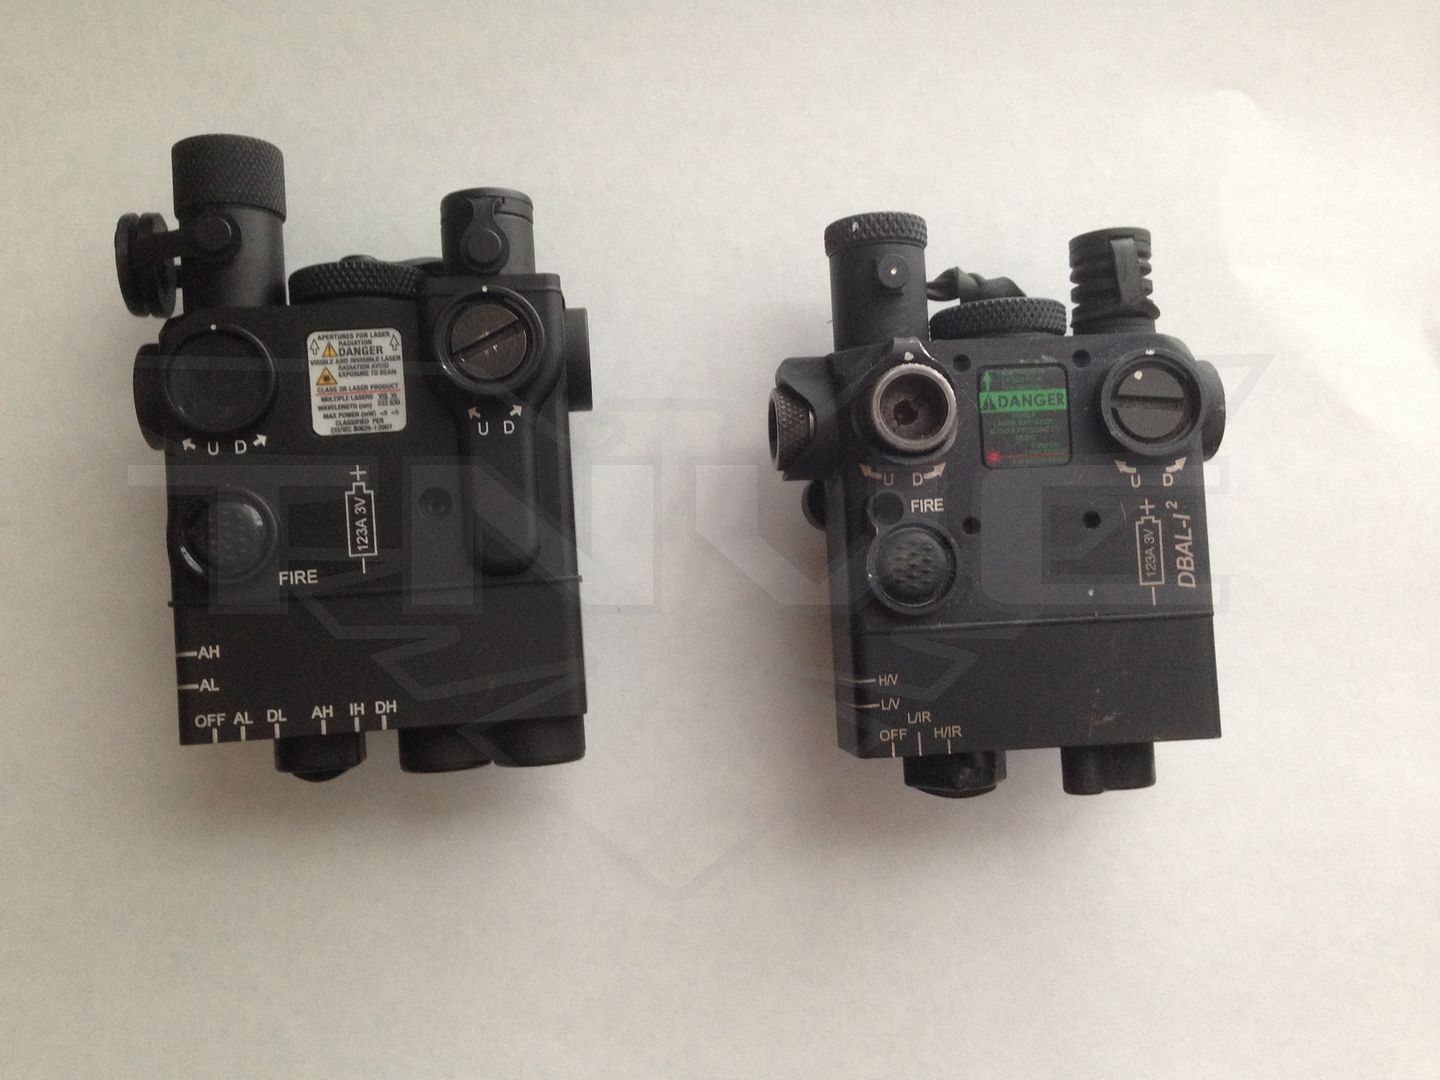
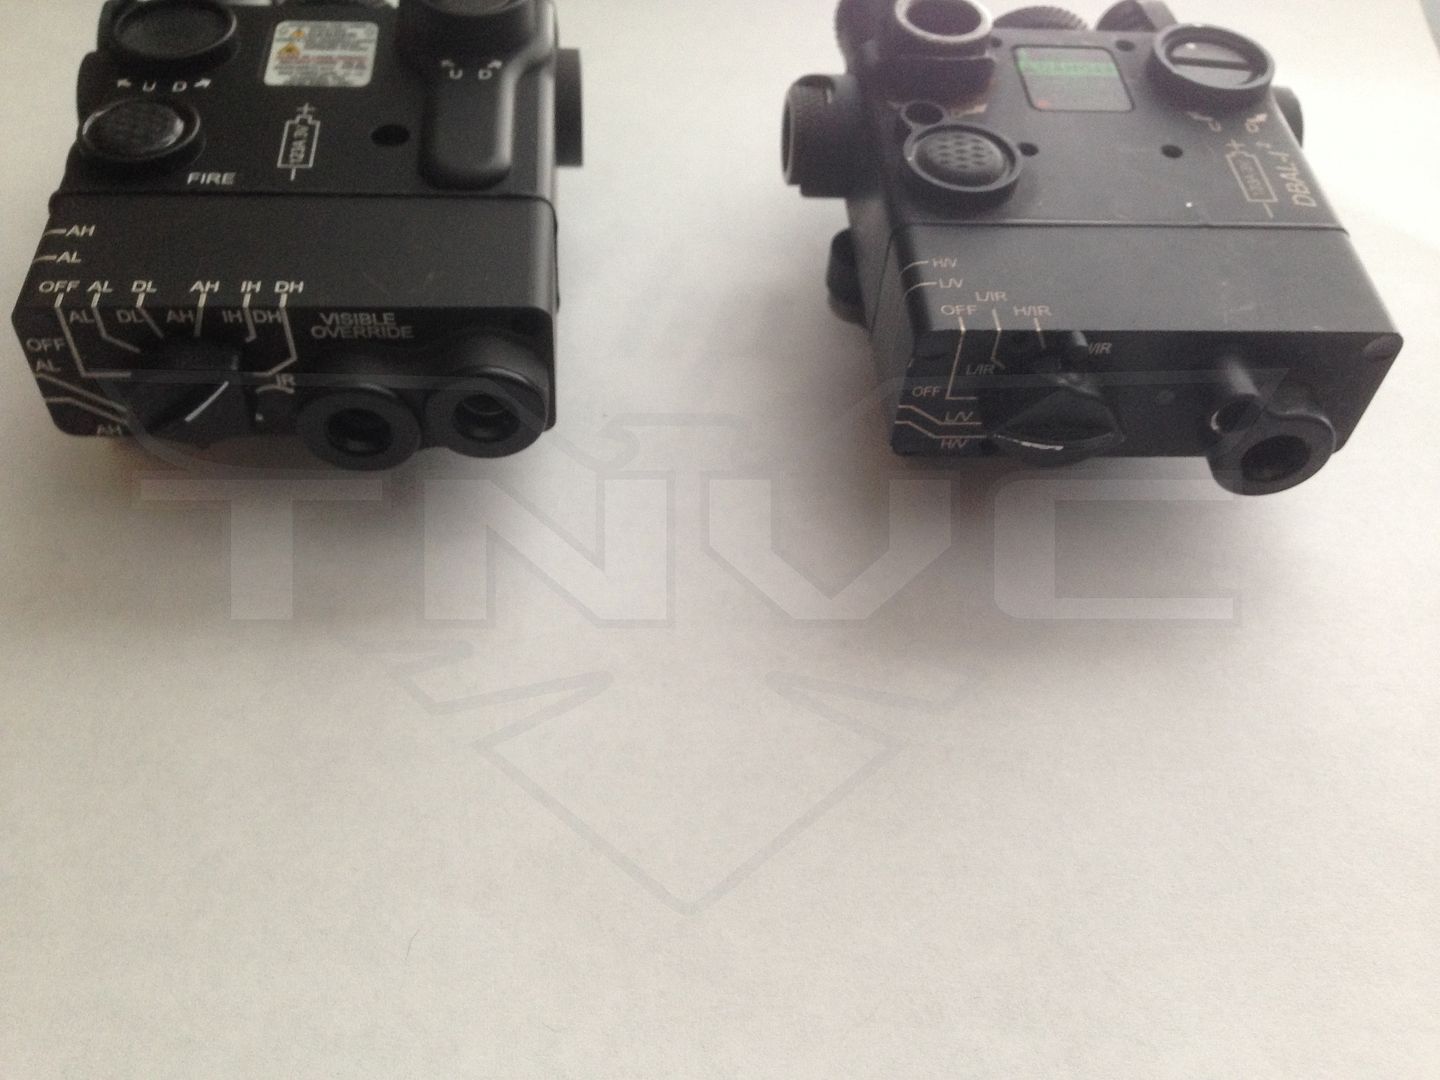
Notice how the Class 1 DBAL A3 doesn't allow for "zeroing" of the IR illuminator.
The visible override port is a pretty awesome feature that is used in this Class 1 DBAL A3, as well as the restricted DBAL A3. The Visible Override port accepts the Steiner Y cable. Essentially this allows you to have a Steiner white light as well as your visible laser activated when you depress this switch no matter what setting the laser is on.
For instance, if I am clearing a building under nods, utilizing the DBAL A3 on an IR setting, if I have to transition to white light rapidly, I just depress the Y pressure pad and my white light and visible laser kick on. [/span][/span][span style='font-size: 10pt;'][span style='font-size: 10pt;']When I let go of the pressure pad, my IR laser/IR illuminator is still on (if I have had the laser set to IR constant on). [/span]You can also use the single pressure pad in the normal port for passive activation of the IR spectrum settings. [/span][span style='font-size: 10pt;'][span style='font-size: 10pt;']The caveat to this is that this feature is only compatible with Steiner Weapon Lights like the Mk4 that is pictured here.
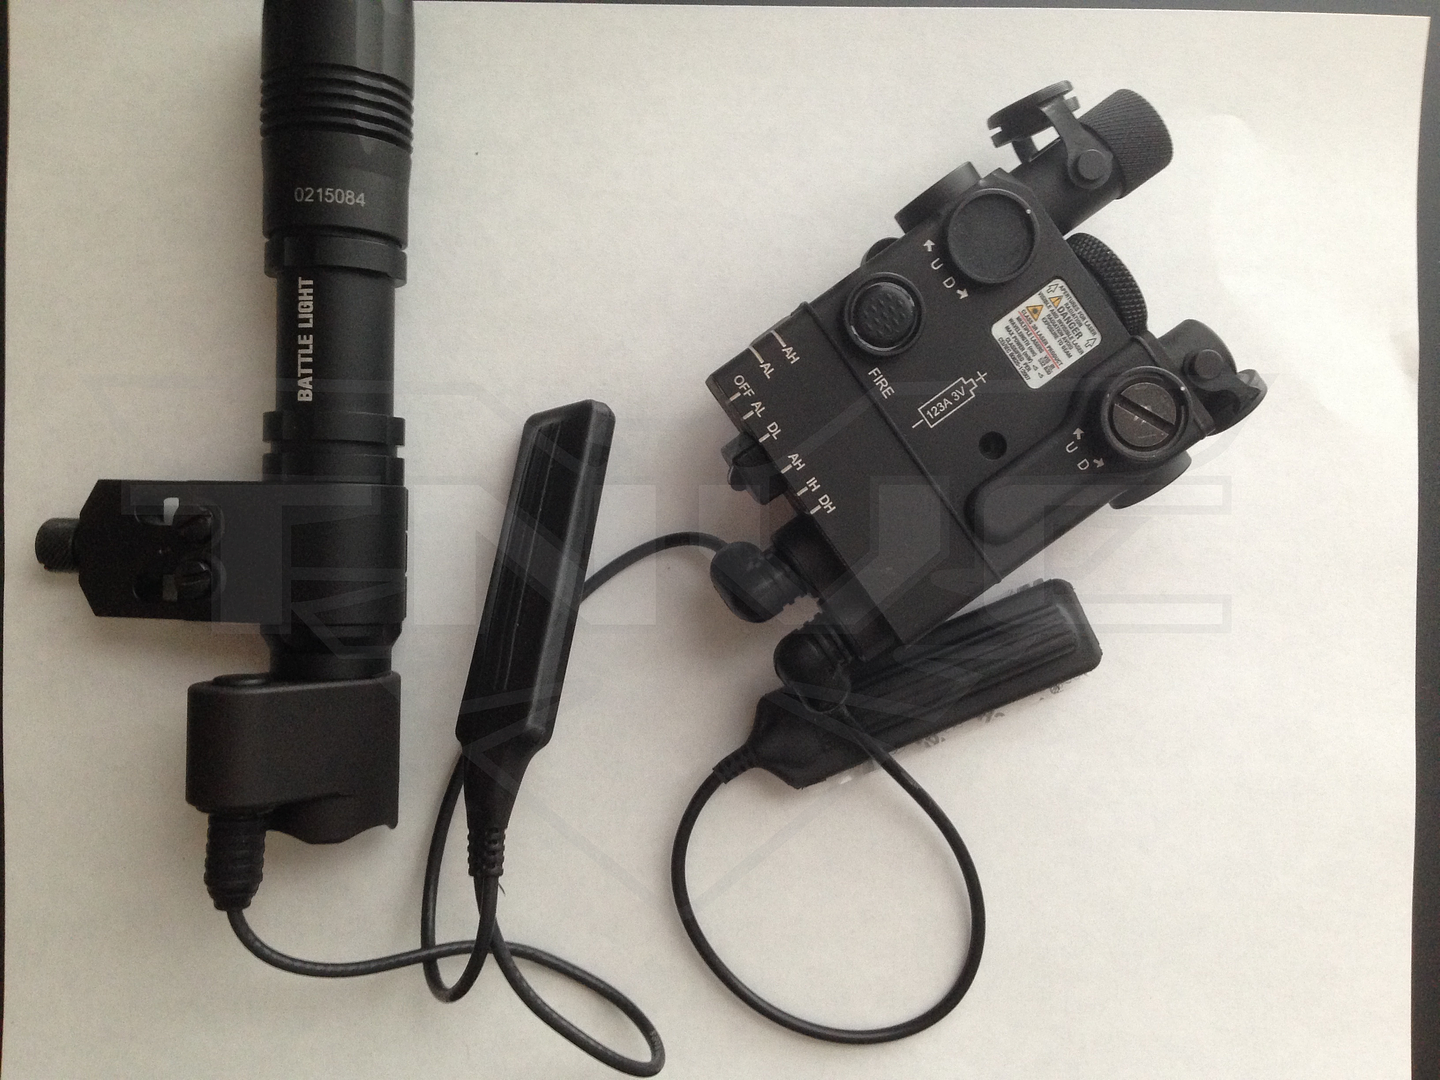
I would stress though the importance of keeping those two pressure switches in separate locations on the rifle that require a deliberate adjustment of hand positioning to achieve activation. White Light ND's are no bueno.
In conclusion, I think the Steiner DBAL A3 Class 1 is a great option for folks that are looking for a solid, reliable IR laser, that also features an IR illuminator. I was a bit surprised at how much adjustability the IR illuminator beam has. For me, I typically set it and forget it, but for those looking for that option, it certainly works just fine.
The Visible Override is also a cool feature that I am glad Steiner carried over from the restricted DBAL A3. I will say that you really have to mash down on the pressure pad of the Y cable in order to get the visible light and laser to kick on. I see this as something that perhaps just the cable I have is doing (because it's a prototype) and not really across the board, at least I am hoping.
Other than those thoughts, I think its good to go.
*All photos posted below are of the DBALA3 Class 1 performing.
In the photos below you will see two letter annotations on most through the tube photos at distance. They are labeled that way to be able to convey which function was being used at that time. The chart below explains what the two letters mean.
AL- Aiming Laser Low Power
DL- Dual (IR Laser and IR Illuminator) Low Power
AH- Aiming Laser High Power
IH- IR Illuminator High Power
DH- Dual (IR Laser and IR Illuminator) High Power
OUTDOOR TESTING
These photos were taken in a somewhat secluded area. There was no visible light within the vicinity, and the conditions were no stars, no moon, heavy clouds. The lighting you see on the horizon is from a car processing center located at one of the ports approximately 1 mile away There is a good amount of marsh separating that distance as well. The light is being refracted from the heavy cloud coverage.
The photos below do not show the IR laser Low Power or IR laser High Power. The reason is because I couldn't tell a difference on the settings with my eye, and certainly couldn't tell the difference in the photos.
The furthest I am comfortable with saying is an effective range of the IR illuminator is 150-175 in it's narrowest form.
INDOOR TESTING
All of these photos on the indoor test, were taken on the live fire range at Telluric Group’s training facility.This facility is optimized for low light/ no light training and the lighting can be controlled very precisely. The conditions in these photos are – no lights on whatsoever. The only visible light was the glow in the dark tape on the ranges light switch module, and the LED on the coffee machine in the classroom outside of the range, approximately 50 feet away, and on the other sideof the bullet proof observation windows looking into the range. It was"can’t see my hand in front of my face” dark.
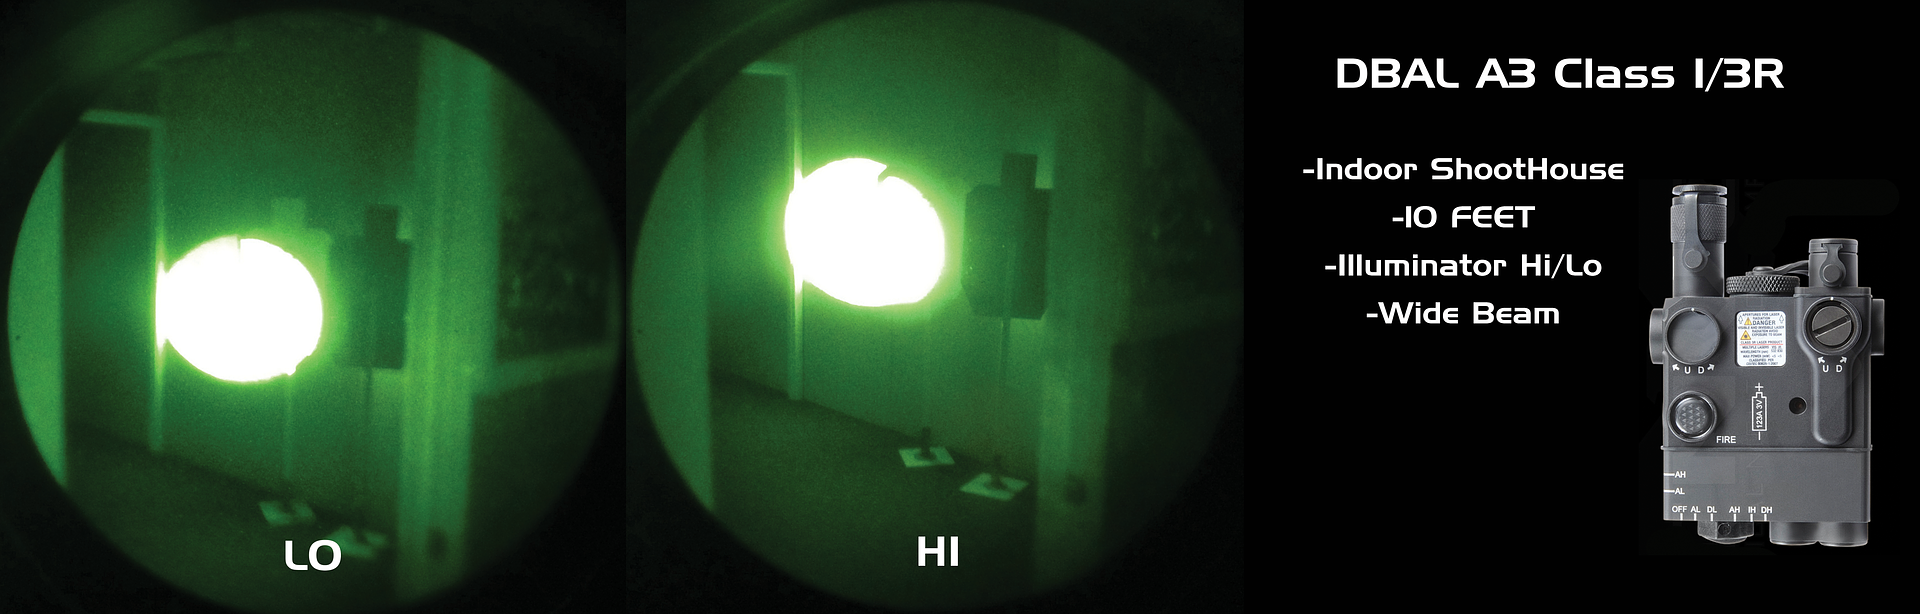
The above photo somewhat represents the usefulness of having a HI/LO setting on the IR illuminator. In most cases you would want to adjust your illuminator into it's widest setting possible, and put it on a low power setting when using in short range indoor environments. Notice house the High Power photo washes out the rest of the IPSC target that is resting on, and how you can see a good remaining portion of the IPSC target on the low power setting. This is very important for law enforcement/military/home defense, because too much IR light CAN and WILL wash out the person you're interrogating with IR light, and you won't be able to identify if they are friend or foe. Again, this is not a 1:1 representation because the IR light is a bit saturated.
The IR illuminator is just as visible on this laser as it's restricted counterpart, and by that I mean just barely. It’s hard to see, unlessyou are standing DIRECTLY in front of the unit, looking DIRECTLY into the emitter, which I DO NOT RECOMMEND. The faint red dot is hard to see and this isprimarily because the emitter is recessed into the housing. The photos below,were taken with my iPhone 5, at a distance of 15 yards in pitch black conditions.
IR ILLUMINATOR WIDTHS
The IR illuminator in it's narrowest form has a measurable spread of roughly 3 foot at 15 yards. In its widest form has a measurable beam of 5 foot. This means at 25 yards 5 feet (narrow) and 9 feet (wide), and so on.
AESTHETICS
The exterior of the laser is identical to it's restricted counter-part, the DBAL A3 with the exception of not having the ability to zero or align the IR illuminator.
In the photos below, you can see it's size compared to the DBAL I2, and how the rear controls are different.
Notice how the Class 1 DBAL A3 doesn't allow for "zeroing" of the IR illuminator.
The visible override port is a pretty awesome feature that is used in this Class 1 DBAL A3, as well as the restricted DBAL A3. The Visible Override port accepts the Steiner Y cable. Essentially this allows you to have a Steiner white light as well as your visible laser activated when you depress this switch no matter what setting the laser is on.
For instance, if I am clearing a building under nods, utilizing the DBAL A3 on an IR setting, if I have to transition to white light rapidly, I just depress the Y pressure pad and my white light and visible laser kick on. [/span][/span][span style='font-size: 10pt;'][span style='font-size: 10pt;']When I let go of the pressure pad, my IR laser/IR illuminator is still on (if I have had the laser set to IR constant on). [/span]You can also use the single pressure pad in the normal port for passive activation of the IR spectrum settings. [/span][span style='font-size: 10pt;'][span style='font-size: 10pt;']The caveat to this is that this feature is only compatible with Steiner Weapon Lights like the Mk4 that is pictured here.
I would stress though the importance of keeping those two pressure switches in separate locations on the rifle that require a deliberate adjustment of hand positioning to achieve activation. White Light ND's are no bueno.
In conclusion, I think the Steiner DBAL A3 Class 1 is a great option for folks that are looking for a solid, reliable IR laser, that also features an IR illuminator. I was a bit surprised at how much adjustability the IR illuminator beam has. For me, I typically set it and forget it, but for those looking for that option, it certainly works just fine.
The Visible Override is also a cool feature that I am glad Steiner carried over from the restricted DBAL A3. I will say that you really have to mash down on the pressure pad of the Y cable in order to get the visible light and laser to kick on. I see this as something that perhaps just the cable I have is doing (because it's a prototype) and not really across the board, at least I am hoping.
Other than those thoughts, I think its good to go.

")